Importing images and video
Time-lapse
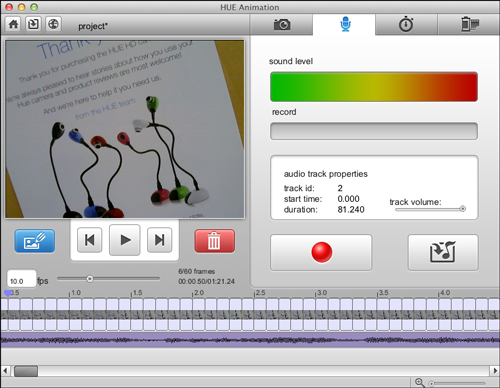
HUE Animation makes recording audio easy. All you need is a microphone, which many computers already have built in. If yours does not, any USB microphone will work. HUE Animation Studio owners can also use their HUE Camera as a microphone.
The HUE Animation software gives you two tracks for audio, so you can record background sounds and a spoken narrative separately.
Recording Audio
Begin by clicking on the Audio tab at the top of the screen, then select the frame where you want the audio recording to begin. Click the Record Audio button.
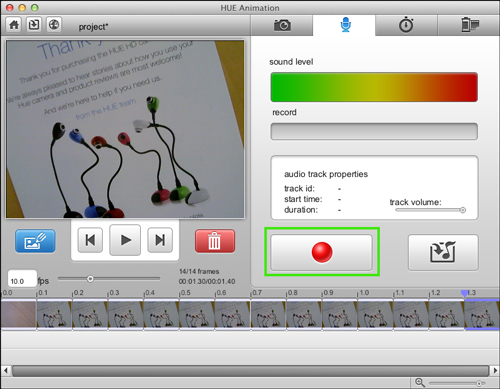
The Record bar will turn red, to indicate that you are recording.
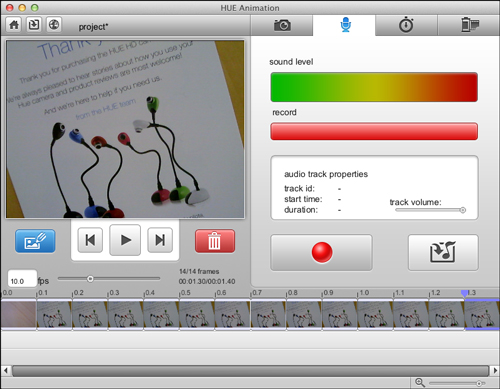
To stop recording simply press the Record Audio button again.
Importing Audio
Begin by selecting the frame where you want the music to start playing. Click the Import Audio button.
Note: File -> Import can be used for videos and photos only. You must use the Add Audio tab to import audio into your animation.
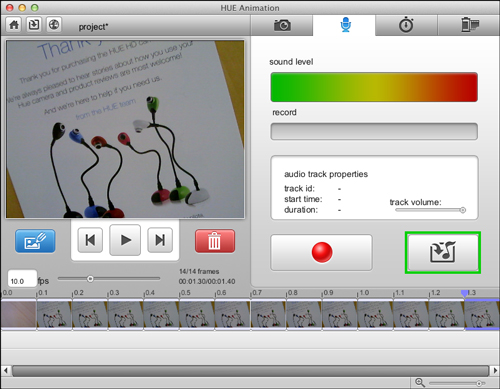
A menu will pop up and allow you to choose an audio file from anywhere on your computer. Once you have chosen the file, click the Import Audio File button in the bottom right.
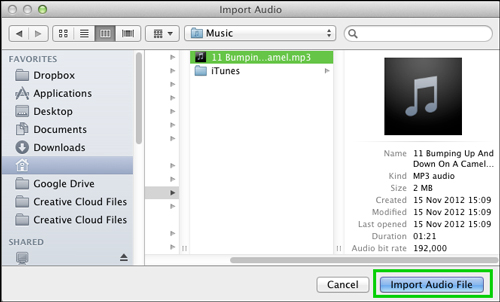
The window will close, and your audio will appear in the track below your frames.
Editing Audio
Note: Audio clips can overlap, so if you already have an audio clip in the first track, they will overlap. This can make it easy to “lose” your clip, so try keeping them in separate tracks.
Cutting the length of your audio is easy. Simply place your cursor at the end or beginning of the track. Your cursor will turn into the shape pictured below.

Click and drag your cursor to cut the clip. You can use the same trick to lengthen the cut audio track if you decide to make it longer again later.
To easily match your animation frames to an audio clip, you can click on the Manage Timeline tab at the top of the screen and choose the Fit To Audio icon (a musical note with a picture and a double-ended arrow). This feature allows you to adjust the frame rate of the film to match your audio file with a single mouse-click.
For a list of supported audio file types, please see the Supported File Types FAQ.
Audio Tips
When recording your own audio, try to be in a quiet space without any background noise.
- Always speak a bit louder than you think you should (it’s easier to make tracks quieter than
it is to make them louder). - Remember that you can record many small clips or one longer one.
- Try mixing recorded audio and imported audio. Remember that you have two tracks for audio; this enables you to include background and foreground sounds simultaneously. This can be helpful if you want to use background music to give a general feel to your animation, while narrating a story over the top.
- Try looking online for free downloadable sound clips – or record your own! Family members, friends and pets can be great ‘guest’ voice actors.
- Animation focuses on movement and changes over time. So make sure that your audio adds to your animation and helps create a sense of excitement!
- The bonus sound effects from the HUE Animation Studio pack can be downloaded following these instructions if you have a registered HUE Animation license on your account.
