HUE Camera Viewer is a free tool for connecting to your HUE camera using Google’s Chrome browser on Windows, macOS, Linux or ChromeOS.
You can try HUE Camera Viewer now here.
If you choose to store your HUE Camera Viewer projects on Google Drive, you will be asked for permission to connect to the service so that the software can display and save your images and videos on your Drive. Our Privacy Policy explains how HUE Camera Viewer uses your information and exactly which details will be shared.
If you subscribe to our blog via email, you’ll be notified about all of the latest HUE news. You can unsubscribe at any time; please see our Privacy Policy for full details of how your email address will be stored and used.
Already using the beta version of our app? Please see below for help with common setup problems.
FAQs: HUE Camera Viewer
At this time, HUE Camera Viewer can only be used with HUE cameras.
If you have a HUE camera and see a warning that no HUE camera is detected, please check this solution and then let us know if you are still having trouble with your camera being recognized.
You can contact us with your comments; we would love to hear how we can make HUE Camera Viewer better for our Chrome users.
After all of the feedback so far we have removed the features to streamline the web app for instantaneous live presentations.
HUE Camera Viewer is currently only supported for the Google Chrome browser, compatible with Windows, macOS, ChromeOS and Linux. We recommend checking that your browser is up to date before using the software.
While it may be possible to use HUE Camera Viewer in other browsers, support is only available for Google Chrome at this time.
Open your Google Chrome browser settings and Select the HUE Camera.
- Open HUE Camera Viewer in the Google Chrome browser, then click or tap the menu in the top right of the browser window. It’s represented by three horizontally-stacked dots. One quick way to get there is to hit Ctrl + Shift + Del and then hit the Escape key when that window appears. Then, click or tap Site settings and skip down to Step 5.
- Otherwise, choose Settings from the menu.
- Scroll all the way down the page and open the Advanced link.
- Scroll to the bottom of the Privacy and security section and choose Site settings.
- Choose either Camera or Microphone to configure either setting.
- Refresh the site.
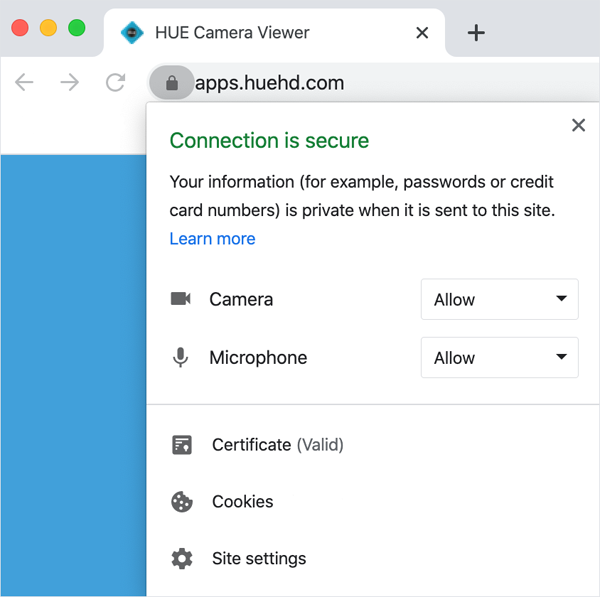
Note: If the camera is still not recognized then click the Secure label next to the website address in the top left of the browser window. Then click Site settings and allow the Camera and Microphone.
On some older versions of Chrome, the Site settings area is called Content settings.
This tutorial will show you how to view your live video in our HUE Camera Viewer app for the Google Chrome browser.
Please note that HUE Camera viewer is currently offered as a beta version for testing. The beta version of the app may have features that will differ from the final version. If you need any help, please check the FAQs and contact us for further assistance.
To access HUE Camera Viewer, visit the link using the Google Chrome browser. You should be asked for permission to use your Camera and Microphone; if you do not see the pop-ups you may need to configure your Chrome security settings.
This Tutorial will be expanded in the coming days.