Activating older versions of HUE Animation
Opening an existing project
To create a new project, launch the HUE Animation software.
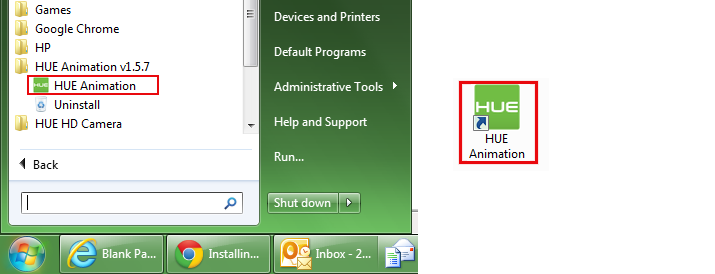
On Windows, there will be a shortcut for the software on the desktop or in the Start Menu.
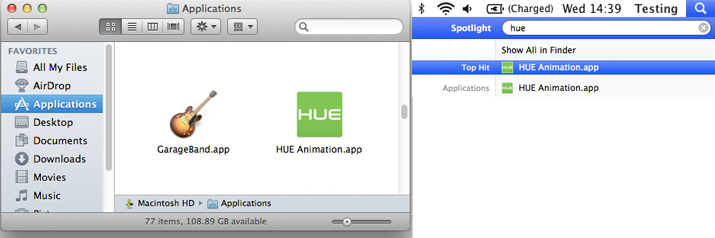
If you’re using a Mac, it will be in the Applications folder.
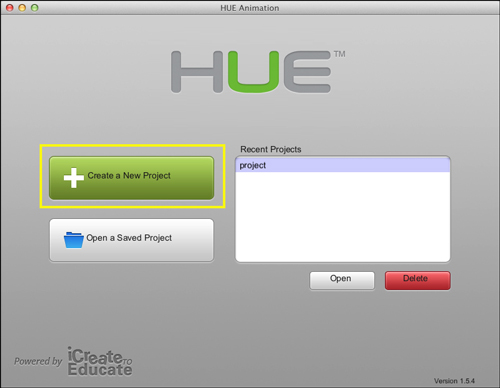
When the program starts, it will give you two options: “Create a New Project” or “Open a Saved Project”. Click the Create a New Project button.
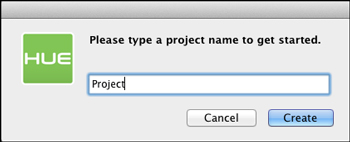
Name your project and click Create.
Note: Your project will automatically save in the Workspace folder you chose during installation unless you choose Save As… from the File menu and choose to save it elsewhere.
Next, the main screen of the software will be shown. You are now ready to start taking pictures.
Note: If you opened the software before connecting the camera, you may need to select Refresh Camera from the Camera menu when you begin.