Getting started with HUE Camera Viewer
J’utilise HUE pour l’enseignement en ligne et mon image est inversée
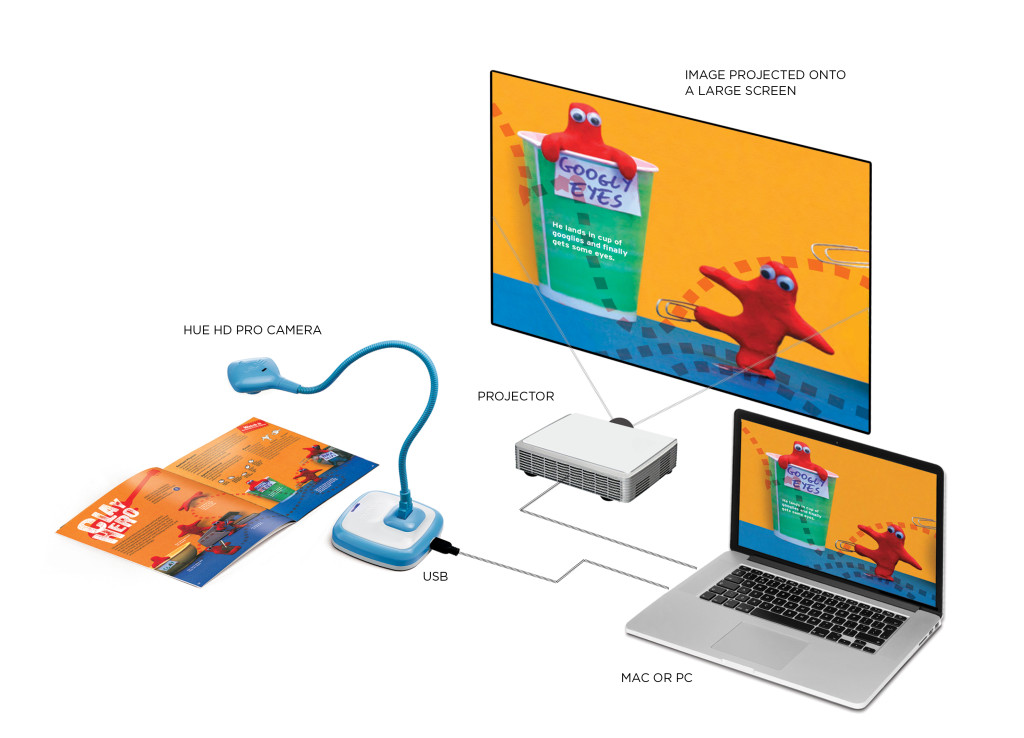
In normal use, all HUE cameras are designed to capture images in the correct orientation if they are positioned at the bottom of the document (as shown in the picture below). This is because HUE is intended to be a multipurpose camera, serving as a document camera, webcam and presentation device.

The HUE camera does not flip or mirror the video itself; what you see on-screen should normally be exactly as shown in the picture. Some versions of Skype and Google Meet (Hangouts) flip the local preview image but your callers will still see the video the correct way round. This is part of those applications’ design and not something we can override. In some cases, the ‘mirror effect’ can be disabled in settings.
Some offline applications (such as Photo Booth) always display the image mirrored and have no option to change this. We recommend avoiding these applications; Apple’s built-in QuickTime application and Microsoft’s built-in Windows 10 Camera tool will display the image correctly.
What if I need to use the camera flipped or mirrored?
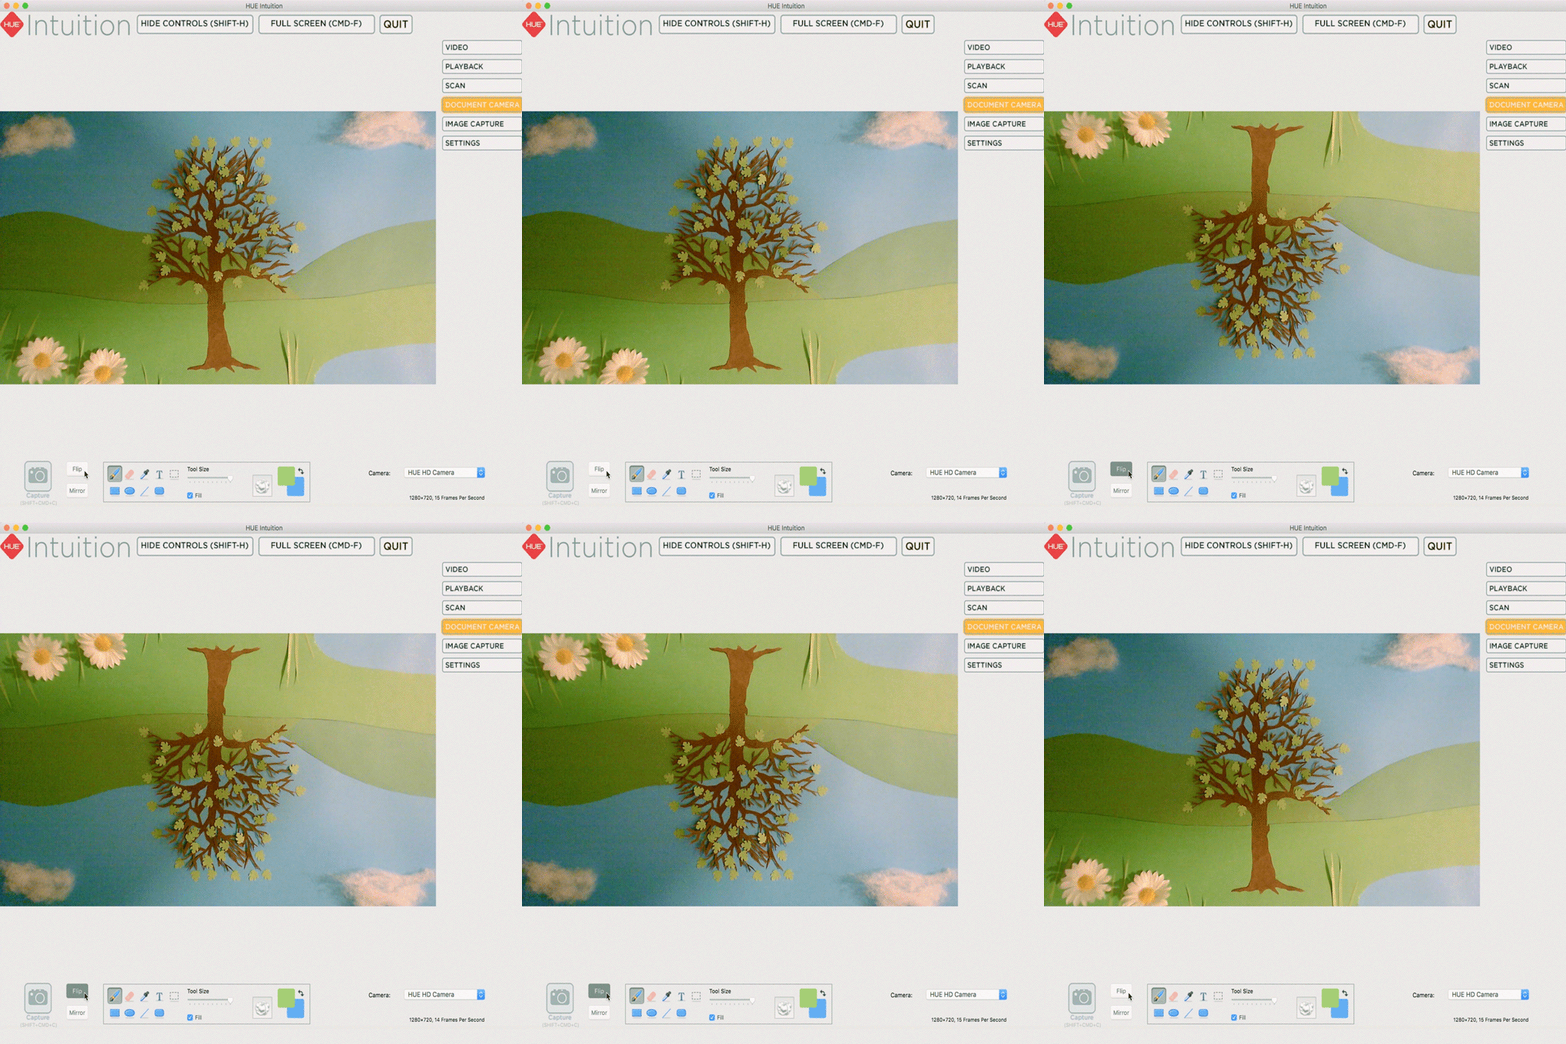
If you are working locally, you can use software such as HUE Intuition or HUE Camera Viewer to flip and mirror the live video freely. HUE Intuition has options for flipping the live video in the Document Camera tab, while HUE Camera Viewer has buttons to do the same at the bottom of the Document Camera (toolbox) section located on the right side of the window.
You can also share the view from your local software in many video conferencing apps using screen sharing. Please check our tutorials for Google Meet, Microsoft Teams and Zoom for step-by-step instructions.

Otherwise, if you’re using a third party video conferencing tool to transmit your video, the controls will be part of that software. There are tutorials available for Blackboard and Zoom. At this time it appears that the rotation feature is limited to the Windows version of Zoom; please contact Zoom directly if this affects you. There are additional camera settings (‘Video Settings’) in the camera selection pop-up menu.
Some applications do not include their own flip/mirror tools. In those cases, third party applications such as ManyCam or SplitCam (Windows-only) can be installed to access additional controls.
OBS Studio works on Windows, macOS and Linux and it includes many options to configure the camera feed.
Changing the video orientation in all of your camera apps
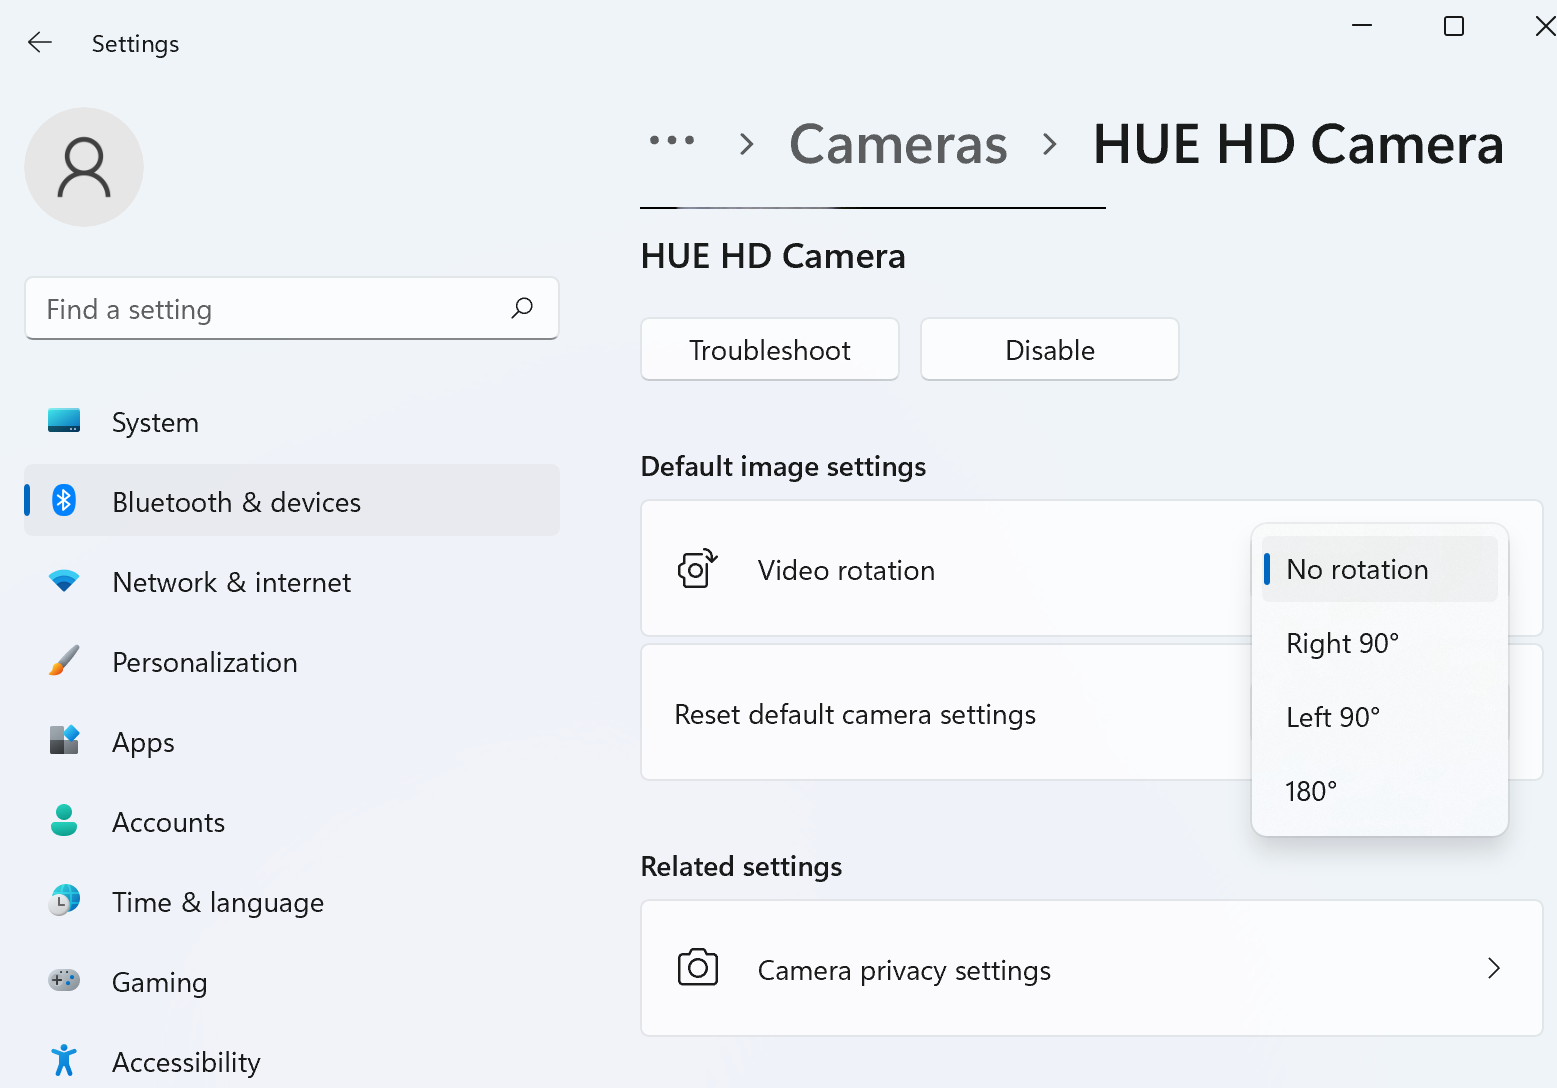
Windows 11 has introduced a new feature to change the default video orientation in all of your apps at once. If you are using an earlier version of Windows, you will need to change the video orientation in one of the third party applications listed above.
To permanently rotate the camera in Windows 11, browse to Start menu> Change Account Settings> Bluetooth & devices> Cameras> (pick your HUE)> Video rotation. You will be able to adjust your default rotation as shown in the screenshot below.

On macOS, iGlasses can also be used to flip and mirror the live video in most applications, including third party video conferencing tools. Apple have not yet added a feature to override the camera settings system-wide.
Please note that we cannot offer support for third party tools ourselves, though we can confirm that the ones listed above will work with HUE.
