You can check the most common questions regarding our HUE products.
We also have a Tutorials section with more information about popular topics. If your question is not answered below, please contact us for support.
To search the FAQs, please click here.
HUE Animation
Click here for the full list of HUE Animation (General) FAQs
Stop Motion Studio
FAQs: Stop Motion Studio
The Stop Motion Studio software included in HUE Animation Studio has been translated into US English, Czech, Danish, Dutch, French, German, Italian, Japanese, Korean, Polish, Portuguese (Portugal), Russian, Simplified Chinese, Spanish (Spain), Swedish, Turkish and Ukrainian. If your computer is set to use one of these supported languages, Stop Motion Studio will be fully localized.
Stop Motion Studio uses the default microphone on your computer for recording audio. In this FAQ we cover the steps you need to follow to change the default microphone input on macOS and Windows computers.
Instructions for macOS
To enable Stop Motion Studio to use your HUE camera’s integrated microphone on macOS:
- Plug your HUE camera into a USB port on your computer.
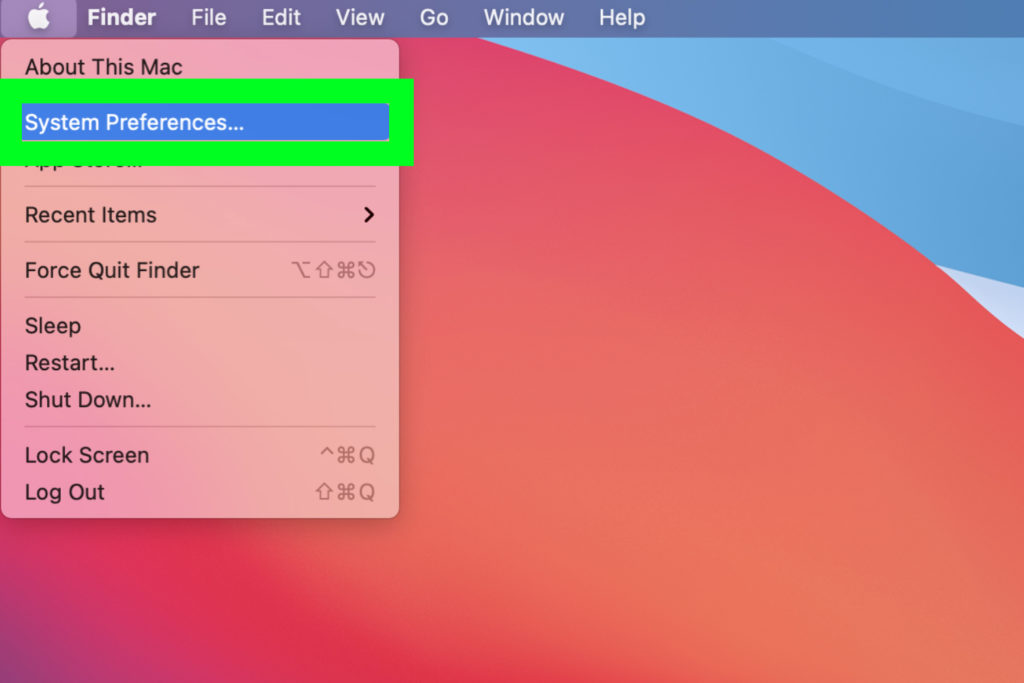
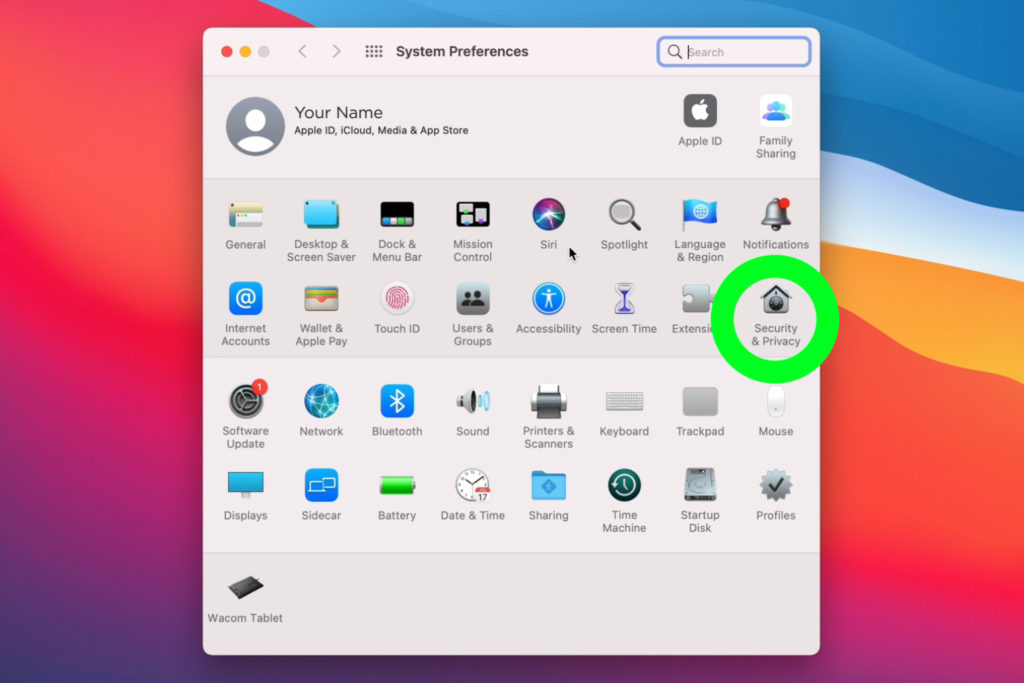
- Go to the Apple menu.
- Choose System Preferences.
- Click on the Sound icon.
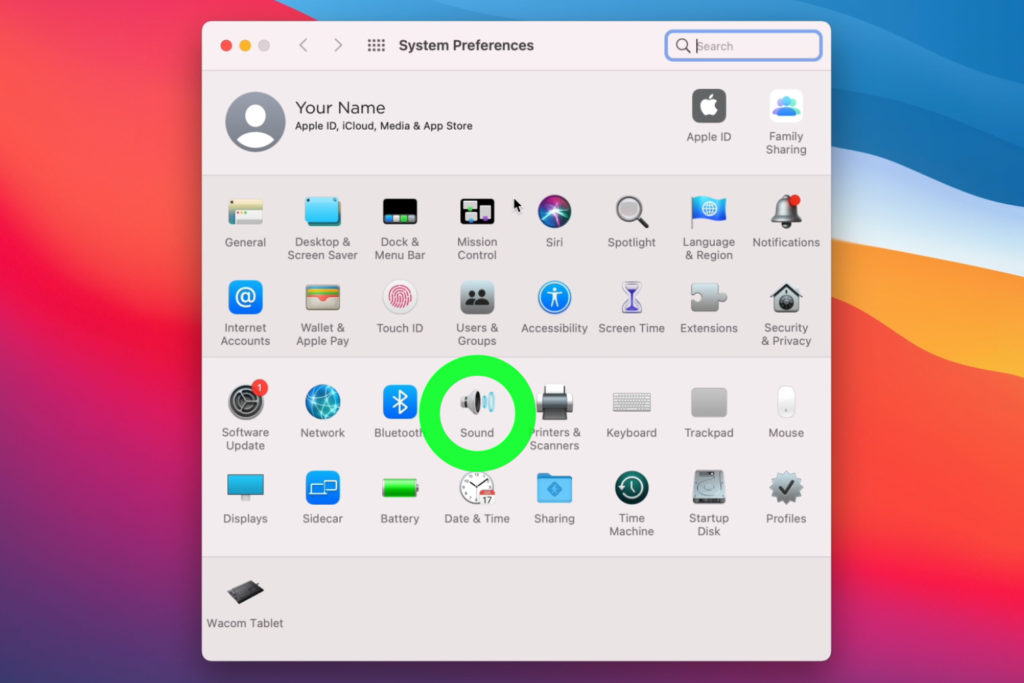
- Select Input from the menu options.
- Choose your HUE camera from the device list.


Instructions for Windows
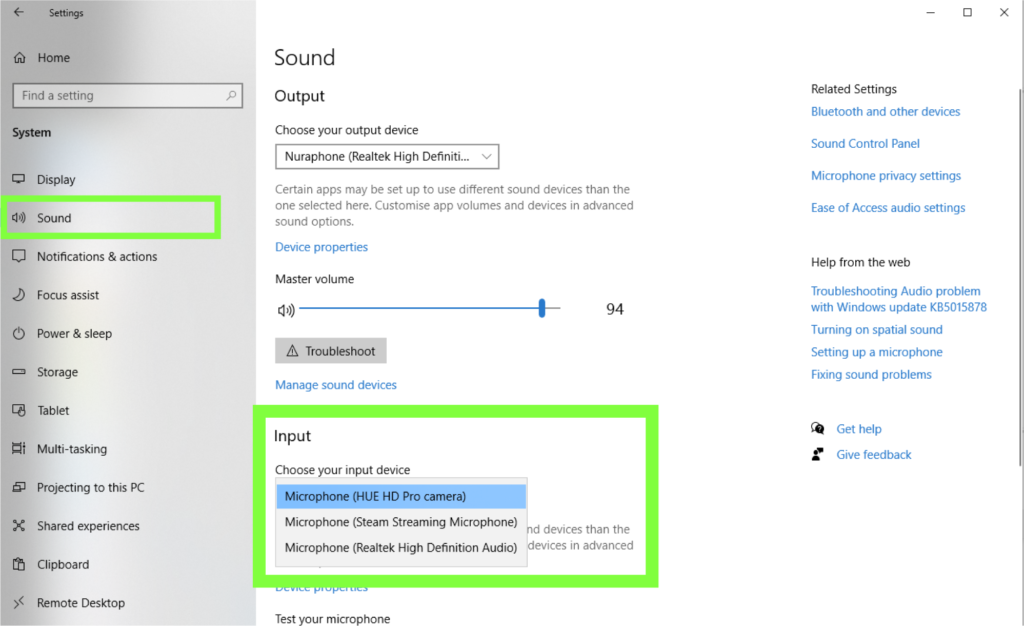
To select your microphone in the PC’s System settings:
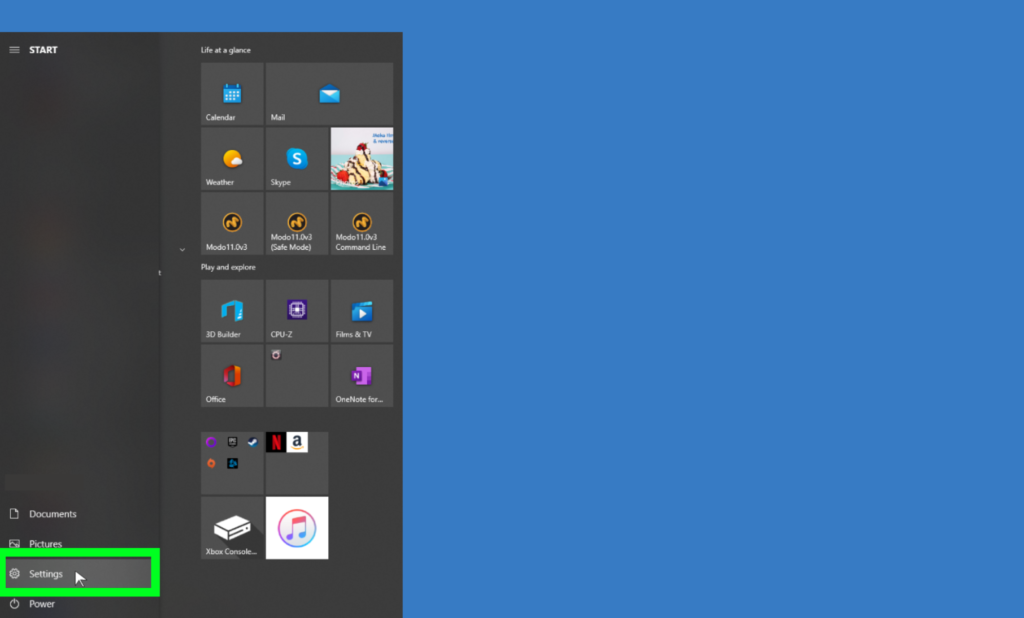
- Click on the System button to open the System settings page. You can also search for the Sound settings using the built-in search feature.
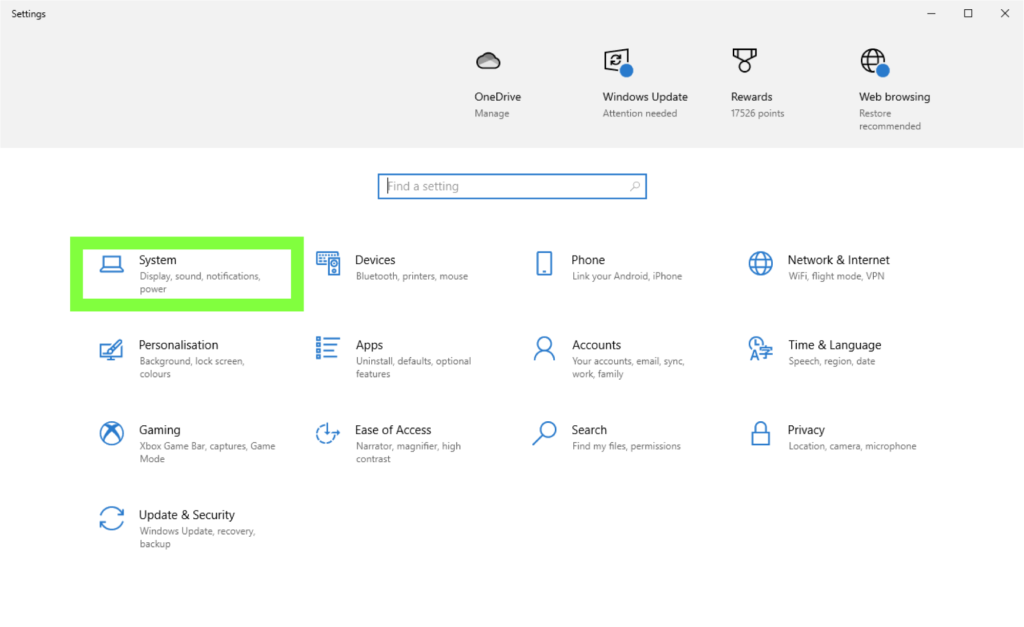
- Click on the Sound option on the left side to reveal the Sound settings.
- At the Input section menu, click on the box below Choose your input device and select your preferred microphone.
Stop Motion Studio system requirements:
- 512MB RAM (1GB recommended)
- Windows 10 or later, or macOS 11+
If your system is not compatible with Stop Motion Studio, you might be able to use HUE Animation software instead.
HUE Animation system requirements:
- PC: Windows 11, 10, 8, 7 or XP and graphics drivers with OpenGL 2.0 support
- Mac: OS X 10.5 (Leopard) to macOS 10.14 (Mojave) * Please note that the HUE Animation software is not compatible with macOS 10.15 (Catalina) or later.
- 512MB RAM (1GB recommended)
If your HUE camera isn’t listed as a capture source in Stop Motion Studio software, checking your computer’s Privacy settings could solve the issue quickly and easily.
In this FAQ you will find written instructions and images – for macOS and Windows – to show you how to allow the Stop Motion Studio app to access your HUE camera.
Instructions for macOS
The Privacy tab will have options to block or allow applications to access your Camera and Microphone. Please ensure that the HUE software you want to use has permission to access both the camera and the microphone; this should unlock the video and audio features in the software.
If the software is missing from the list, removing it and then reinstalling it to the Applications folder should cause macOS to detect it properly. Please contact us if you are having any additional trouble.
Some non-Apple antivirus and security applications also block camera connections by default. Checking your security software settings should help with most connectivity problems.
To allow the Stop Motion Studio app to access your camera:
- Go to the Apple menu.
- Choose System Preferences.
- Click Security & Privacy (also called Privacy & Security in some versions of macOS).
- Choose Camera from the menu.
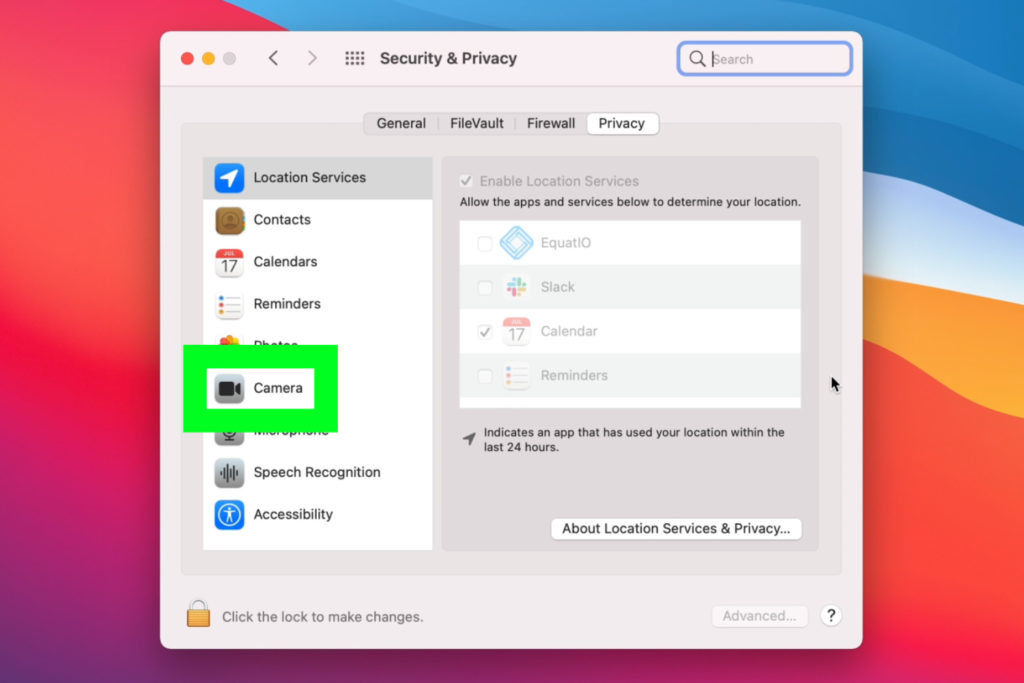
- Allow the Stop Motion Studio app to access your camera.


Instructions for Windows
To prepare your HUE camera for Stop Motion Studio on Windows PCs:
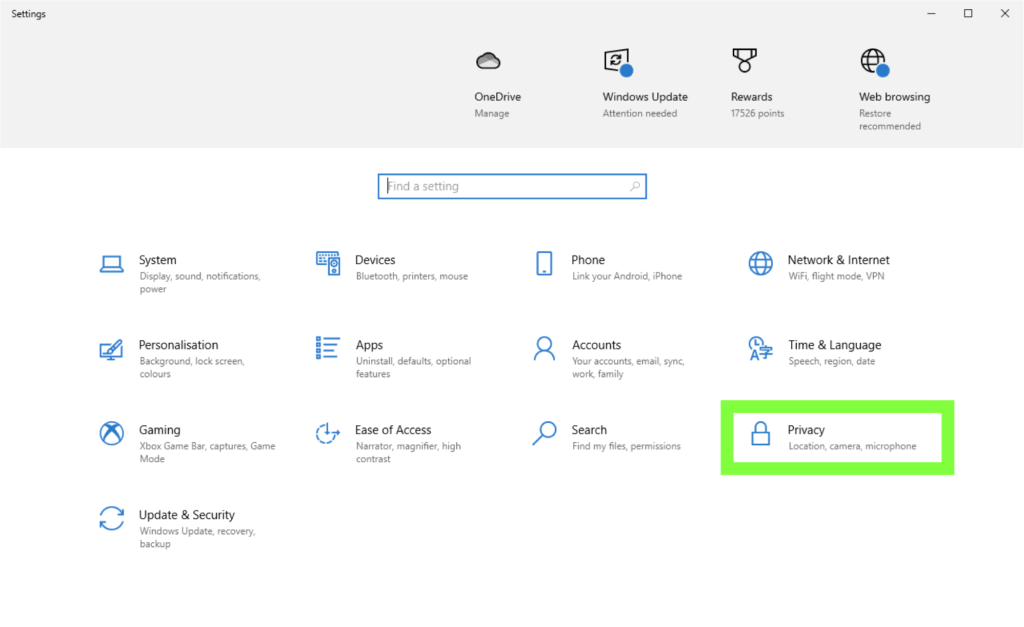
- Open the Settings page and click on the Privacy button. You can also locate the Privacy setting using Windows’ built-in search feature.
- Click on the Camera option on the left side then toggle the button under Allow apps to access your camera.
- Scroll down and toggle the button next to Stop Motion Studio.
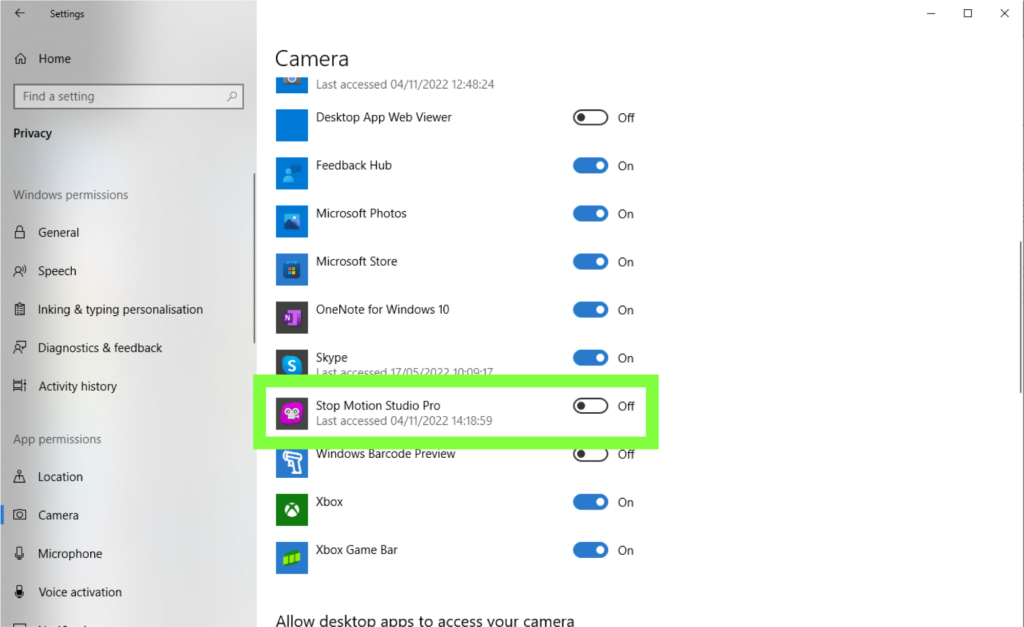
- Click on the Microphone option on the left side to reveal the microphone privacy settings.
- Follow the same steps as you did with the Camera privacy settings by toggling the relevant options.
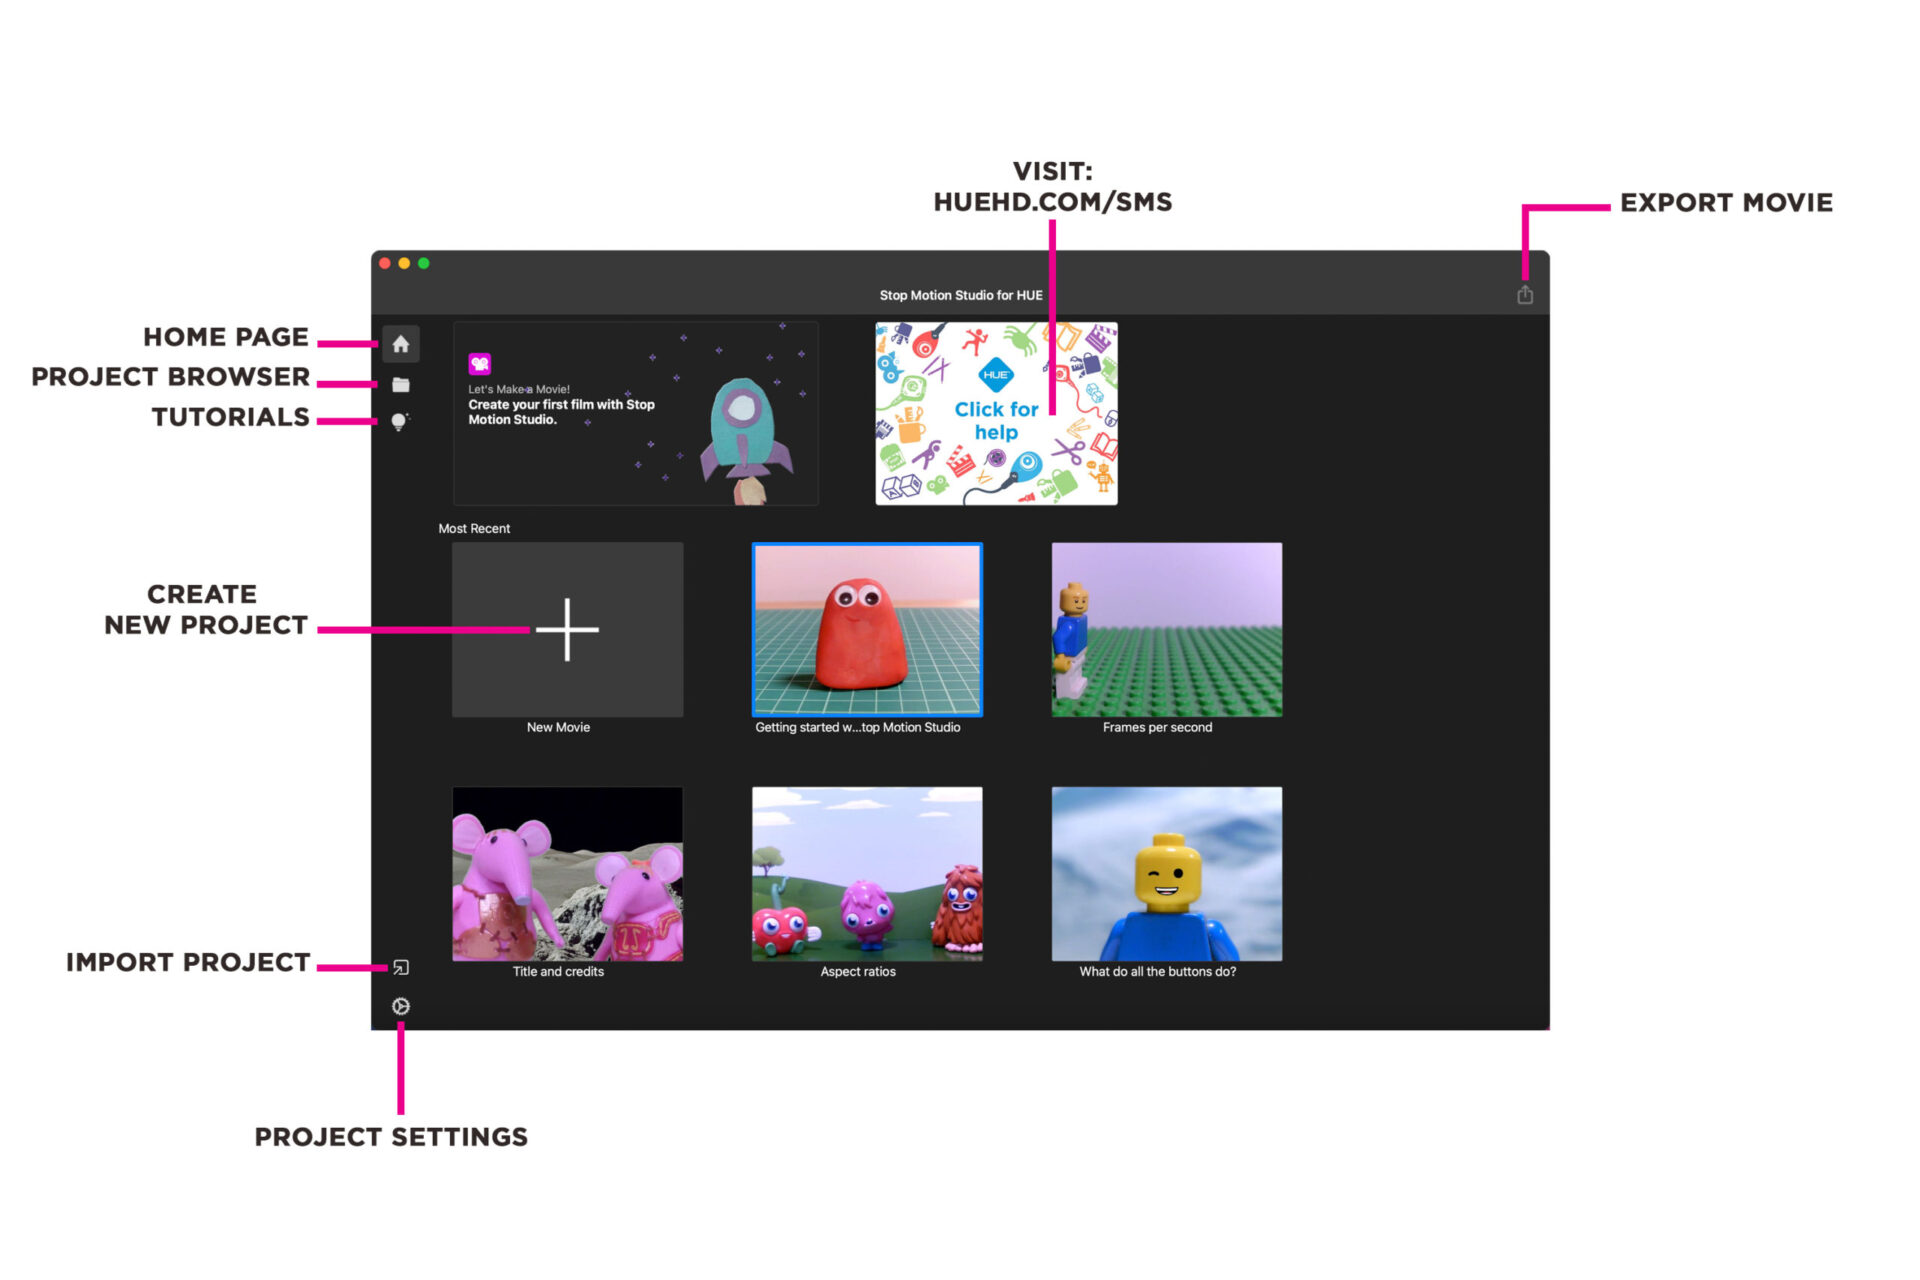
The Stop Motion Studio app HOME PAGE is where you can start a new project, access tutorials and import and export projects.
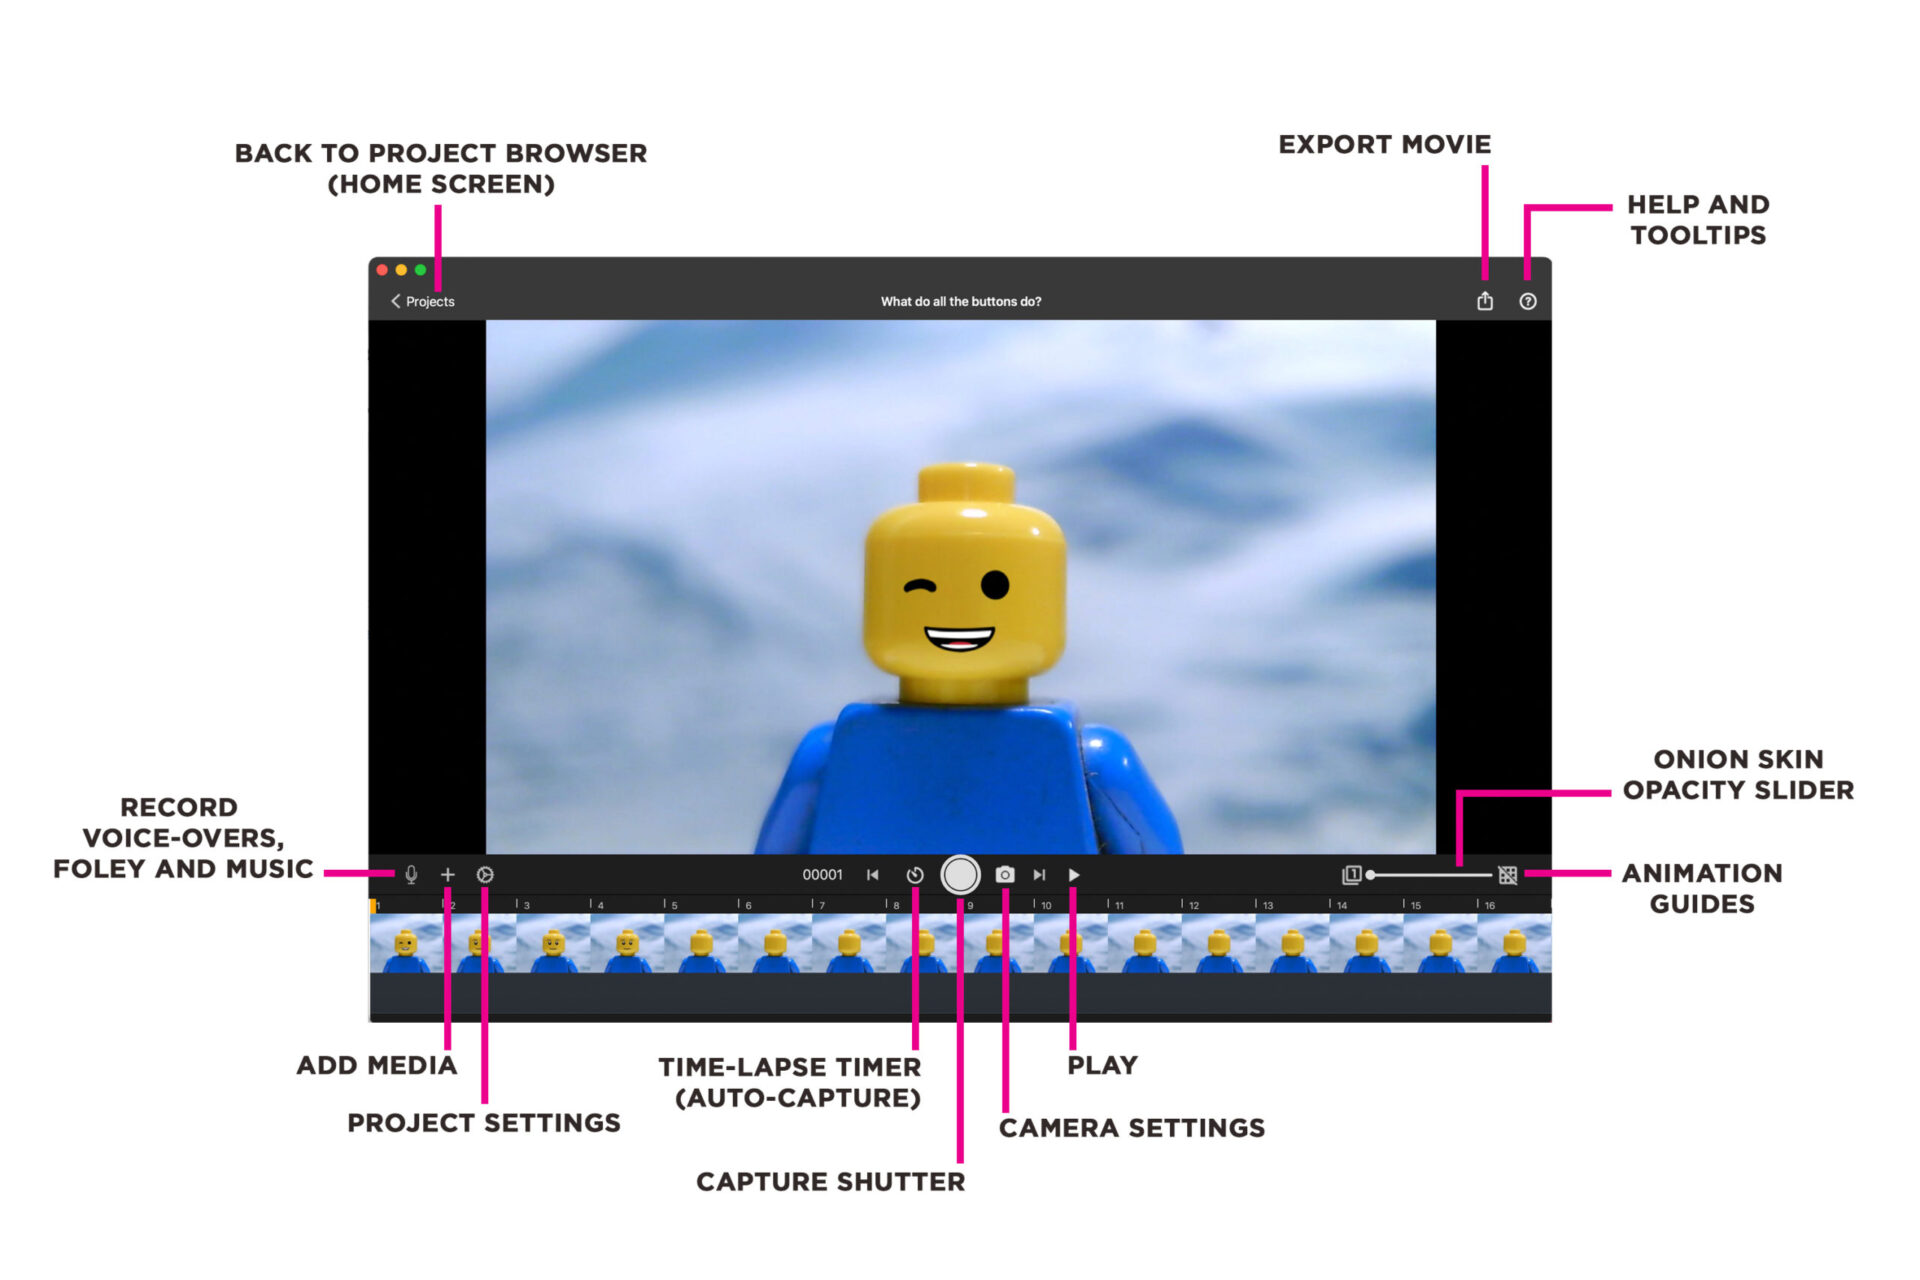
In the PROJECT TIMELINE window, you can access camera and project settings, add media and audio, capture frames, preview your animation and export your movie.
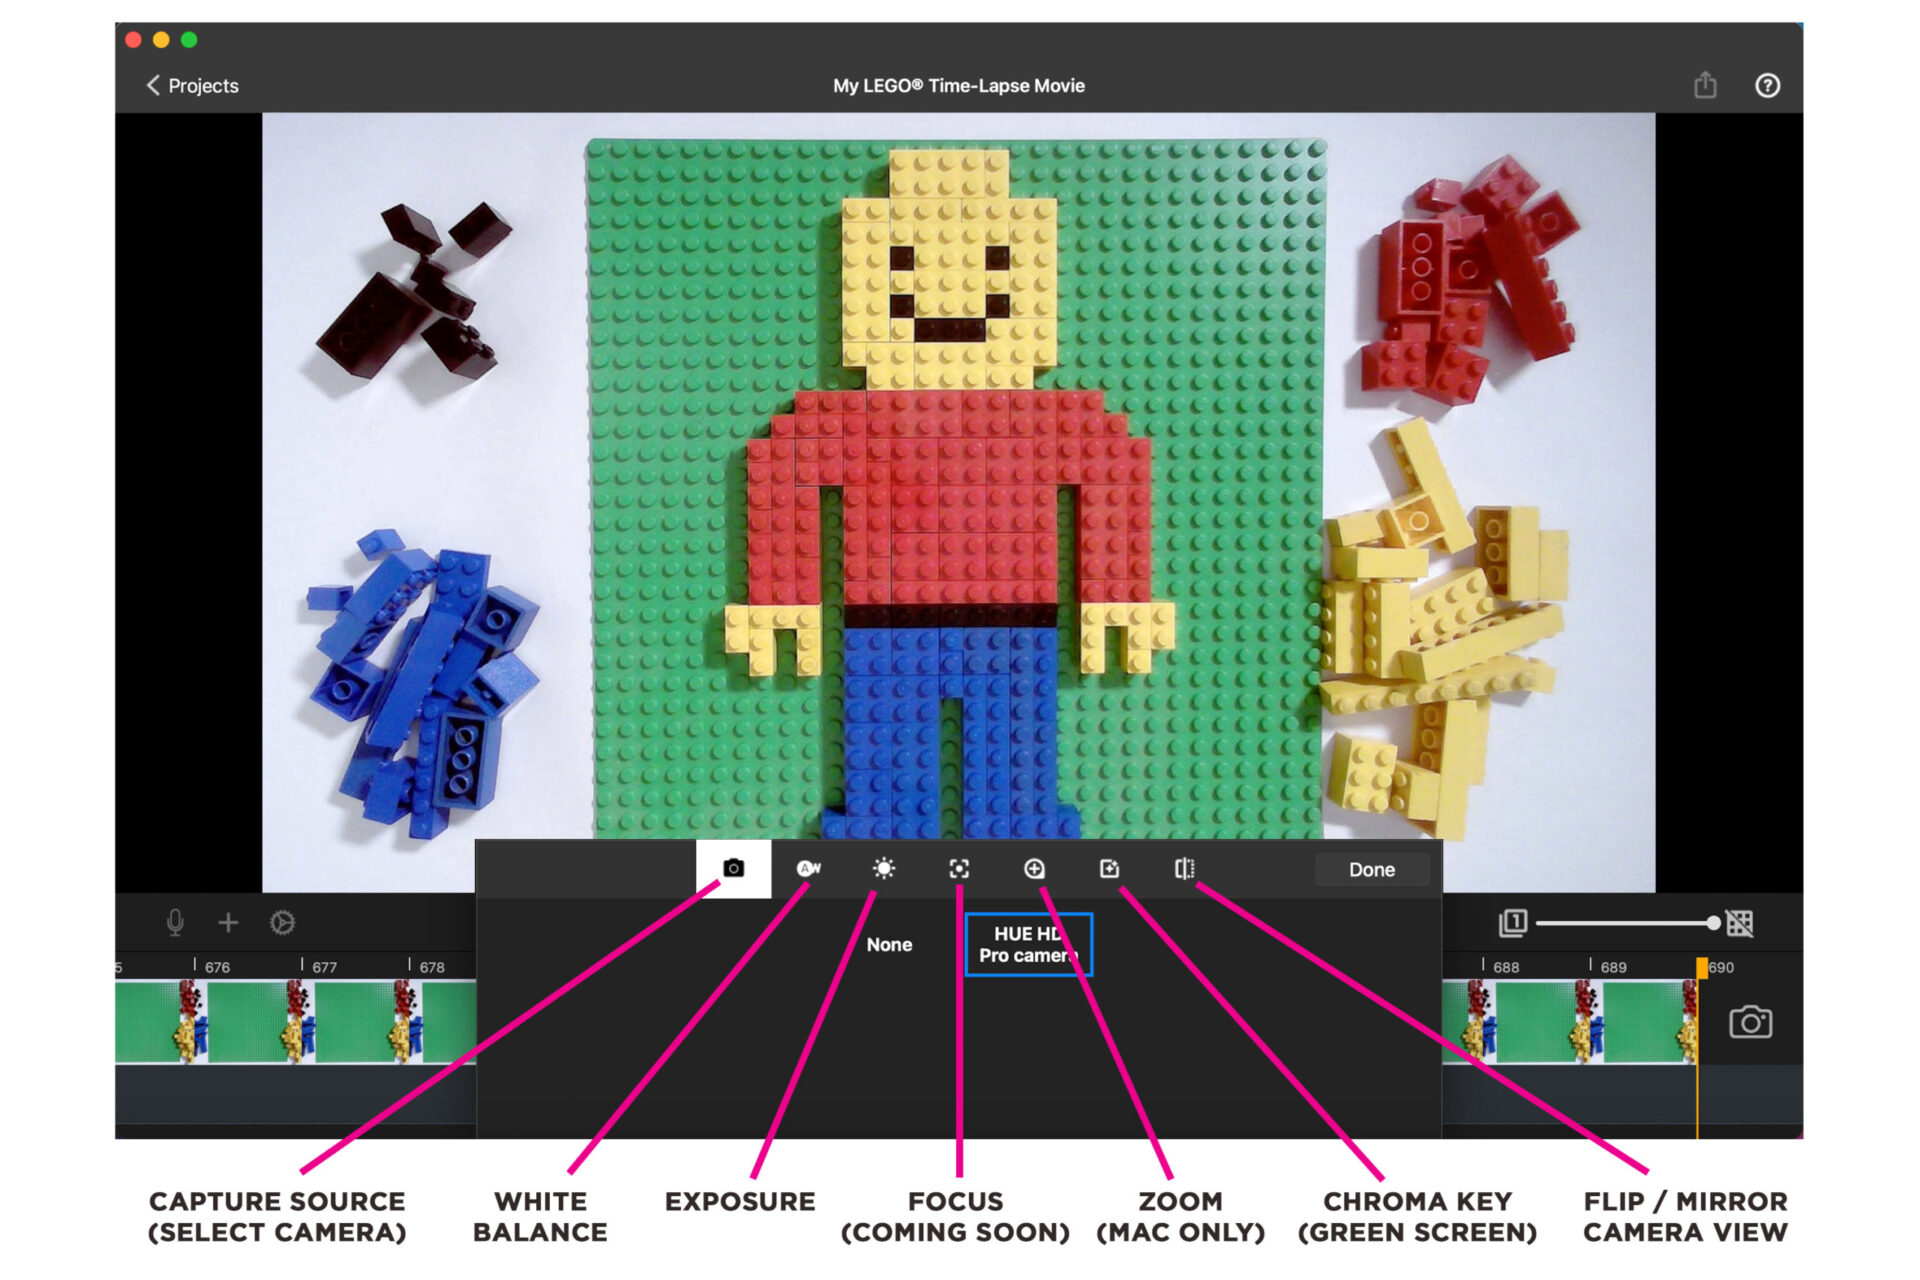
In the CAMERA SETTINGS menu you can select your camera (capture source), make adjustments to the white balance, exposure and orientation of your scene, and access the chroma key (green screen) feature.
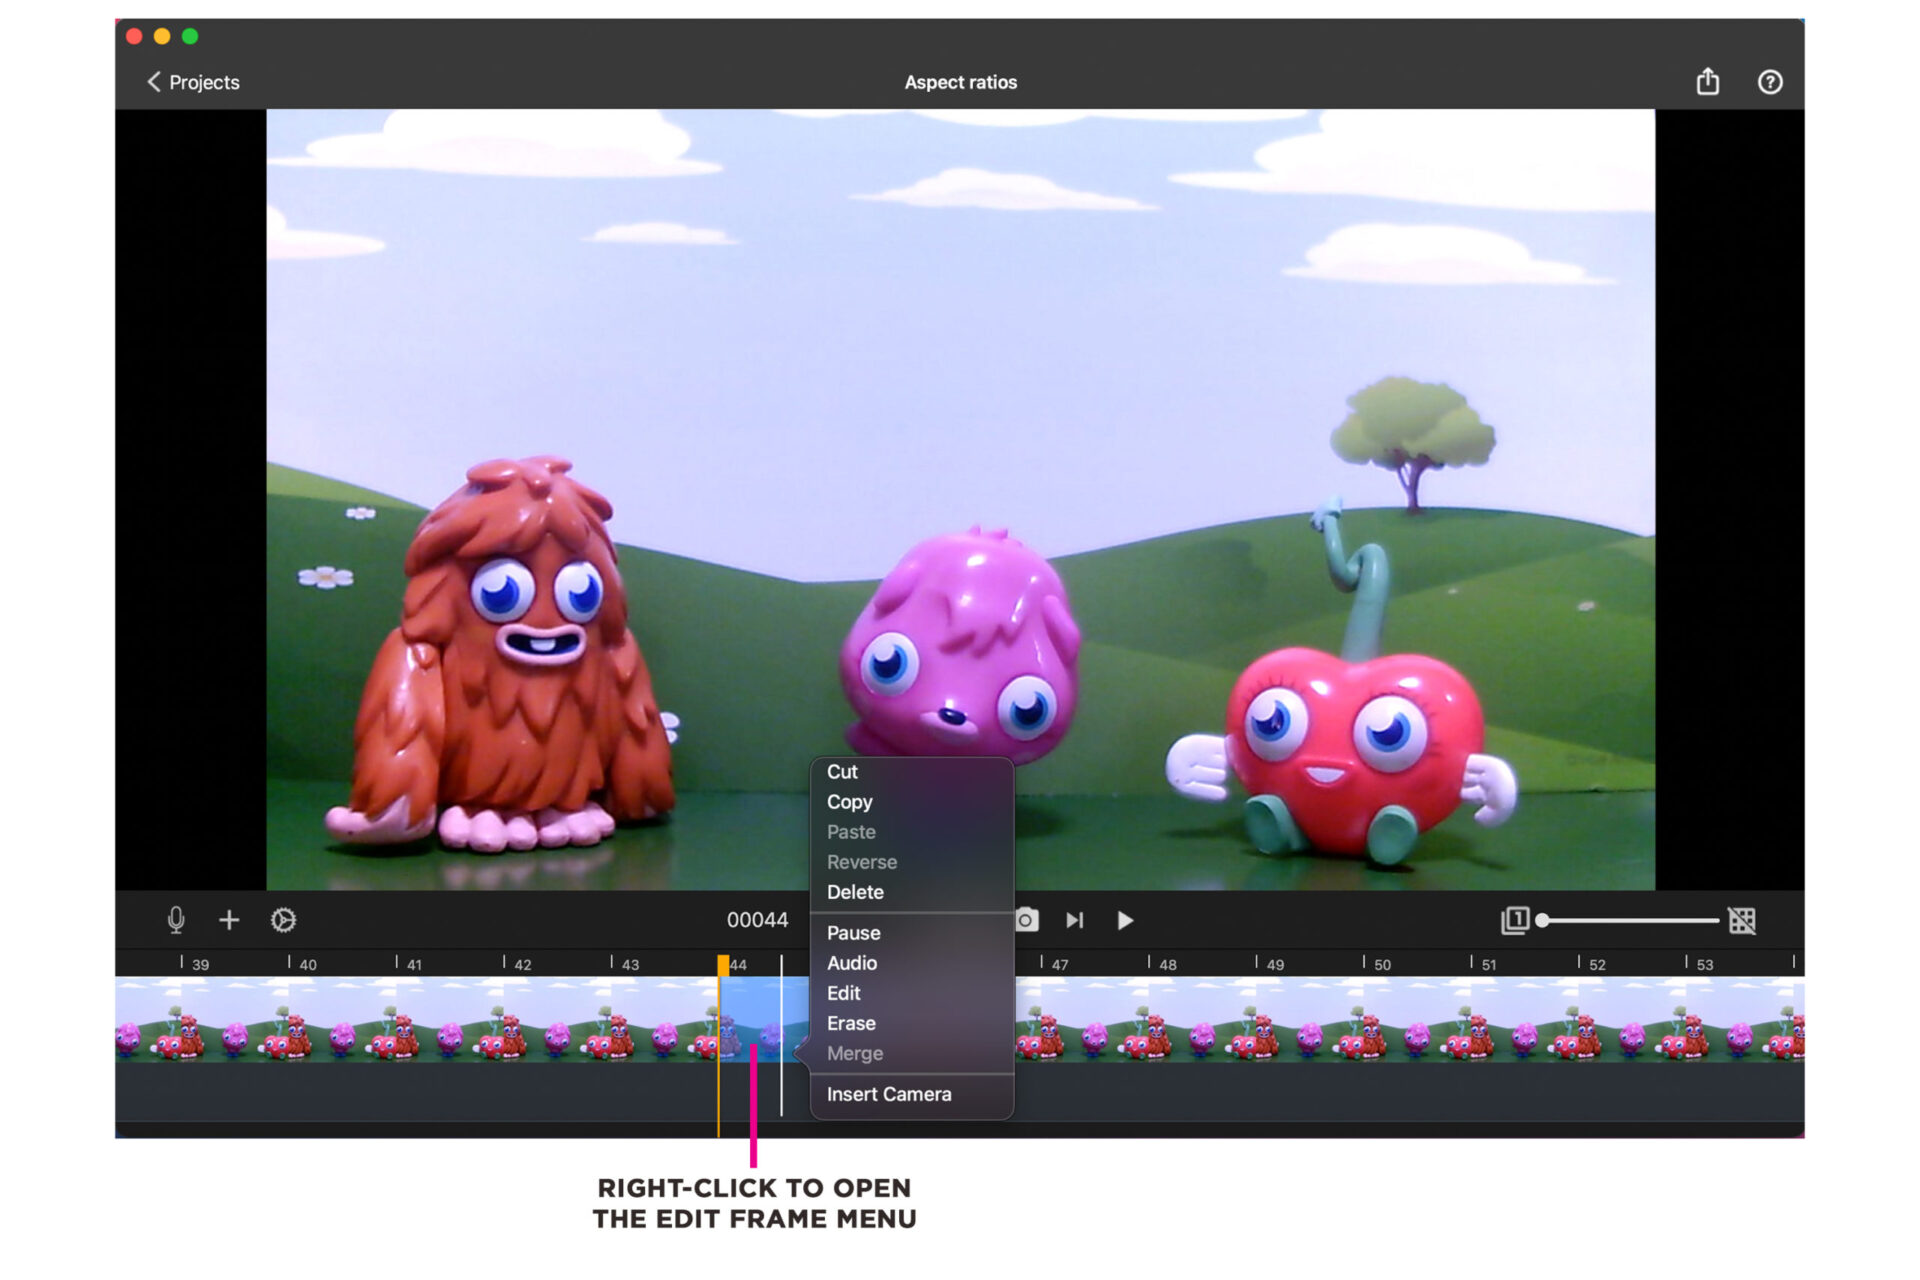
To view the EDIT FRAME menu, right-click on a frame (or multiple frames) in your animation timeline.
In the menu you have options to cut, copy, paste, reverse, delete and pause the duration of the selected frame/s.
Additionally there are options to add audio, edit the frame with drawings, text or shapes, erase drawings, and merge multiple frames.
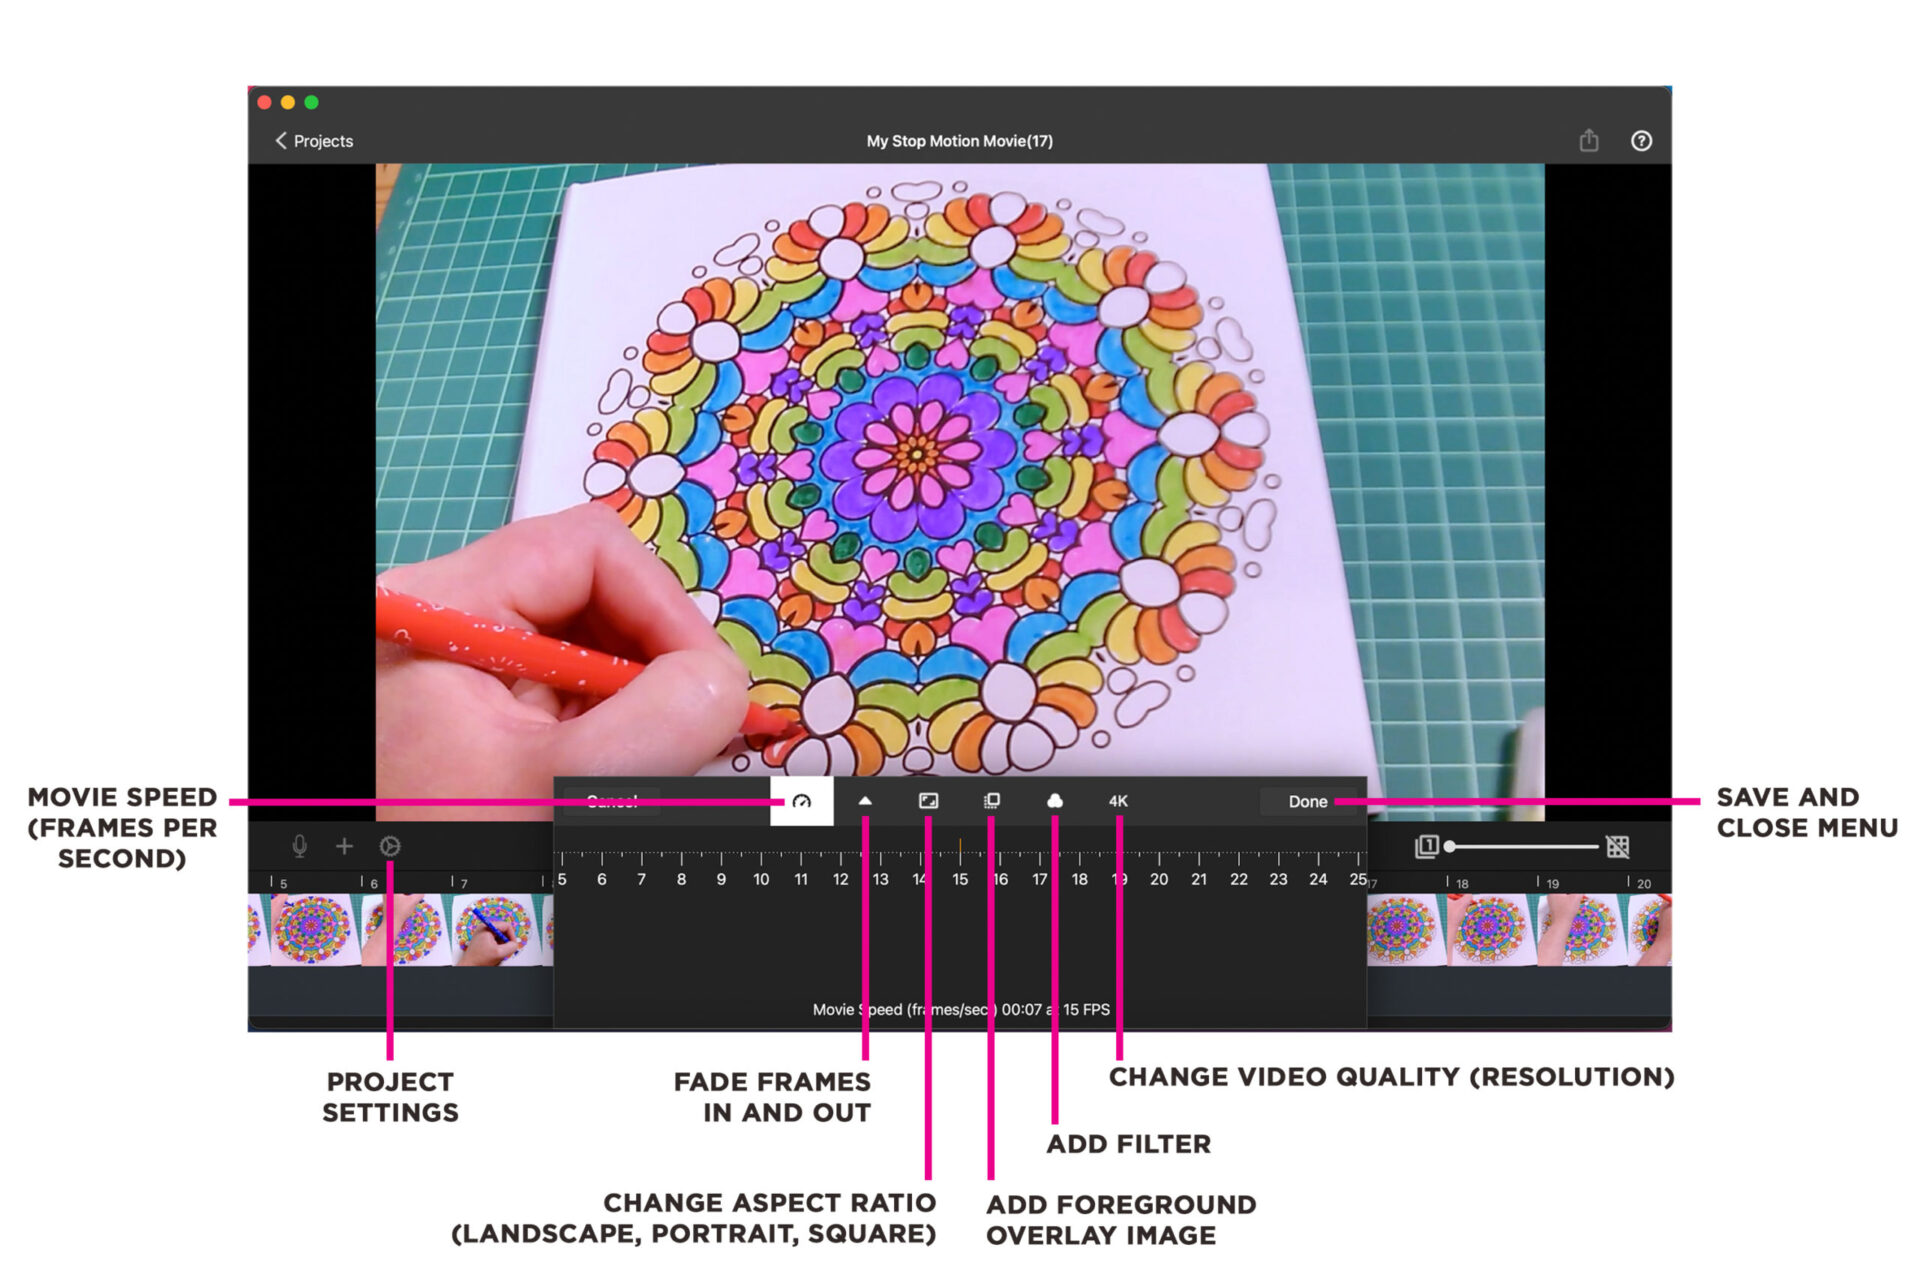
Click the small cog wheel icon to open the PROJECT SETTINGS menu.
Here you will find options to:
- Change the speed of your movie by adjusting the frames per second (fps).
- Fade your movie in or out with a black video overlay.
- Change the aspect ratio of your movie to landscape, portrait or square.
- Add a foreground image over your animation.
- Add a filter effect such as black & white, neon, mirrored and pixelated.
- Change the video quality/resolution of your animation (allowed by the camera you are using).
Click here for the full list of Stop Motion Studio FAQs
HUE Clay
HUE Cameras
Click here for the full list of HUE HD Camera FAQs
Click here for the full list of HUE HD Pro Camera FAQs
HUE Software
Click here for the full list of HUE Intuition FAQs