HUE Sponsors Young Animator of the Year UK

[FR] Mieux apprendre avec votre HUE caméra
Tips and tricks for working with modeling clay
From Art Clokey’s Gumby and Will Vinton’s incredible Adventures of Mark Twain, to Nick Park’s Wallace and Gromit, modeling clay has become one of the most iconic materials associated with stop motion animation to the point that it has spawned its own subgenre, known as claymation.
There are many benefits to using modeling clay for animation. It’s a versatile material that gives a lot of room to improvise whilst animating and the freedom to sculpt or position your character in any way you choose. It also offers a unique style and look; it can be wonderfully bright and colourful and is usually textured with the signature thumbprints of the artist, adding to its handcrafted charm.
However, once you start working with clay, you’ll quickly discover there are a lot of challenges involved. It turns out that even a simple character like Morph is actually a lot more complex than he first seems! This blog post will provide some tips to get you started working with clay.
Professional animation clay is designed to hold its shape and retain as much fine detail as possible. You will quickly notice that it is much firmer than your average play dough, and at first it might seem quite difficult to create the shapes you want without getting sore thumbs. Don’t worry though, it can be softened; roll the clay between your hands to inject a bit of warmth, squeeze and knead it a little and you’ll soon find it is much more workable.
Mix your clay to get the perfect colour
Looking for a particular colour of clay that can’t be bought? Good news! You can mix existing colours to make your own new ones. In this example, we are trying to create a pink clay by mixing red and white. It’s always good to start with the surfaces of each clay colour touching each other as much as possible; here we are ensuring this by twisting the two clay tubes around each other.

For the next step, you might assume that the two pieces of clay should be kneaded and pushed into one another. Whilst this is a great way to ‘condition’ your clay when it is cold and stiff, it’s not really the quickest method to blend two colours together.

Instead, tearing and folding the clay will ensure a quicker, more even mix!

All this friction and contact with your hands may make your clay a bit warm and soft after mixing, so stick in the fridge for a bit if you’re going to be sculpting something intricate!
Creating a base form
You’ll want to consider the shape of the character you are making; what’s its base form and which parts are going to move?
The little head we are making here will remain spherical throughout the sculpting process, so we can layer the clay on top of a core made from a ball of aluminium foil. This reduces the overall weight of the sculpture and means we use less clay. (Yay! More left over for other projects!)

However, for Clay Hero (from the HUE Book of Animation) we would start with a sphere made completely of clay which will become a more humanoid shape when we tease out the arms and legs from the base form. Making Clay Hero entirely from clay (without the aluminium core) will give us more flexible posing options when it comes to animating, and pulling the limbs and head out from the base form (instead of just sticking them on) will ensure the model is strong and less prone to breakage during animation.


The benefits of using aluminium foil in your sculpt will vary depending on what you are using it for. With an aluminium core the model will retain its shape over time with a solid structure it can adhere to. Without one, there are more options for posing during animation, but take care your sculpt doesn’t gradually morph into an unrecognisable shape (unless that’s what you want!)
Smoothing and sculpting
This is the fun part! When you smooth out the lumpy bits and add detail, your sculpt will really come to life.

Creases, lumps and bumps can be removed by gently poking them with a finger or thumb, the aim being to create a smooth, consistent fingerprint-y surface. It can take a little while to smooth out the whole model, patience is key here!
There are many ways to add details and features to your base shape. You can use your hands to knead out new forms, scrape details into the surface with a sculpting tool or add extra lumps of clay (make sure any extra bits are properly stuck on so that they don’t fall off later!).

Using multiple colours
It is notoriously difficult to put two different colours of clay together, as they will start to blend into one another and your previously bright, clean colours will become a murky, muddy mess! This can produce some really lovely shades of brown, but is not necessarily what you want. The more the colours contrast, the more pronounced this problem is – making white eyes with black pupils can be a real challenge!

One way to avoid this is to use a solid alternative to soft clay. Using air drying or oven-hardening clay for things like eyeballs and teeth is a great way to avoid contamination, and it also makes it much easier not to smudge or smoosh any delicate little details. Oven-bake clay is especially great because it has the exact same lumpy, fingerprint-y look as modeling clay. Popular brands of oven bake clay include Sculpey and Fimo.

Keep your clay clean
You should always look for ways to keep your clay from getting grubby. Modeling clay is usually oil-based, and can be quite messy. It will get everywhere if you’re not careful!
Cleaning your hands is the first step to avoiding the dreaded clay contamination. Your clay will always want to suck up any dirt on your hands and it will also leave an oily, coloured residue which can become an issue if you are working with several different clay colours. Before you touch any clay, your hands must be dirt-free and then cleaned regularly as you work. Professional clay animators often use wet wipes to do this. A slightly soapy damp cloth also works (and is a little more environmentally friendly!)
However, even with clean hands, clay is an absolute magnet for dirt. You never realise how much dust there is in the air until you unwrap some modeling clay! When you’re not using your clay, it’s important to keep it safe from dust. Cling film is a great solution for this although you should try to use a minimal amount to avoid plastic pollution.

Animation tips
Be ready to re-sculpt your character as you animate. Clay is a great material that can be moved and positioned in all sorts of ways, but there is a limit and it can tear apart if your character is bending and twisting a lot. It can also slowly deform as you animate. If you don’t pay attention, you’ll suddenly find your character has two big, amorphous blobs where the legs used to be!

For an extra cartoony look, use replacement sculpts if you want your character to squash and stretch into drastically different poses.

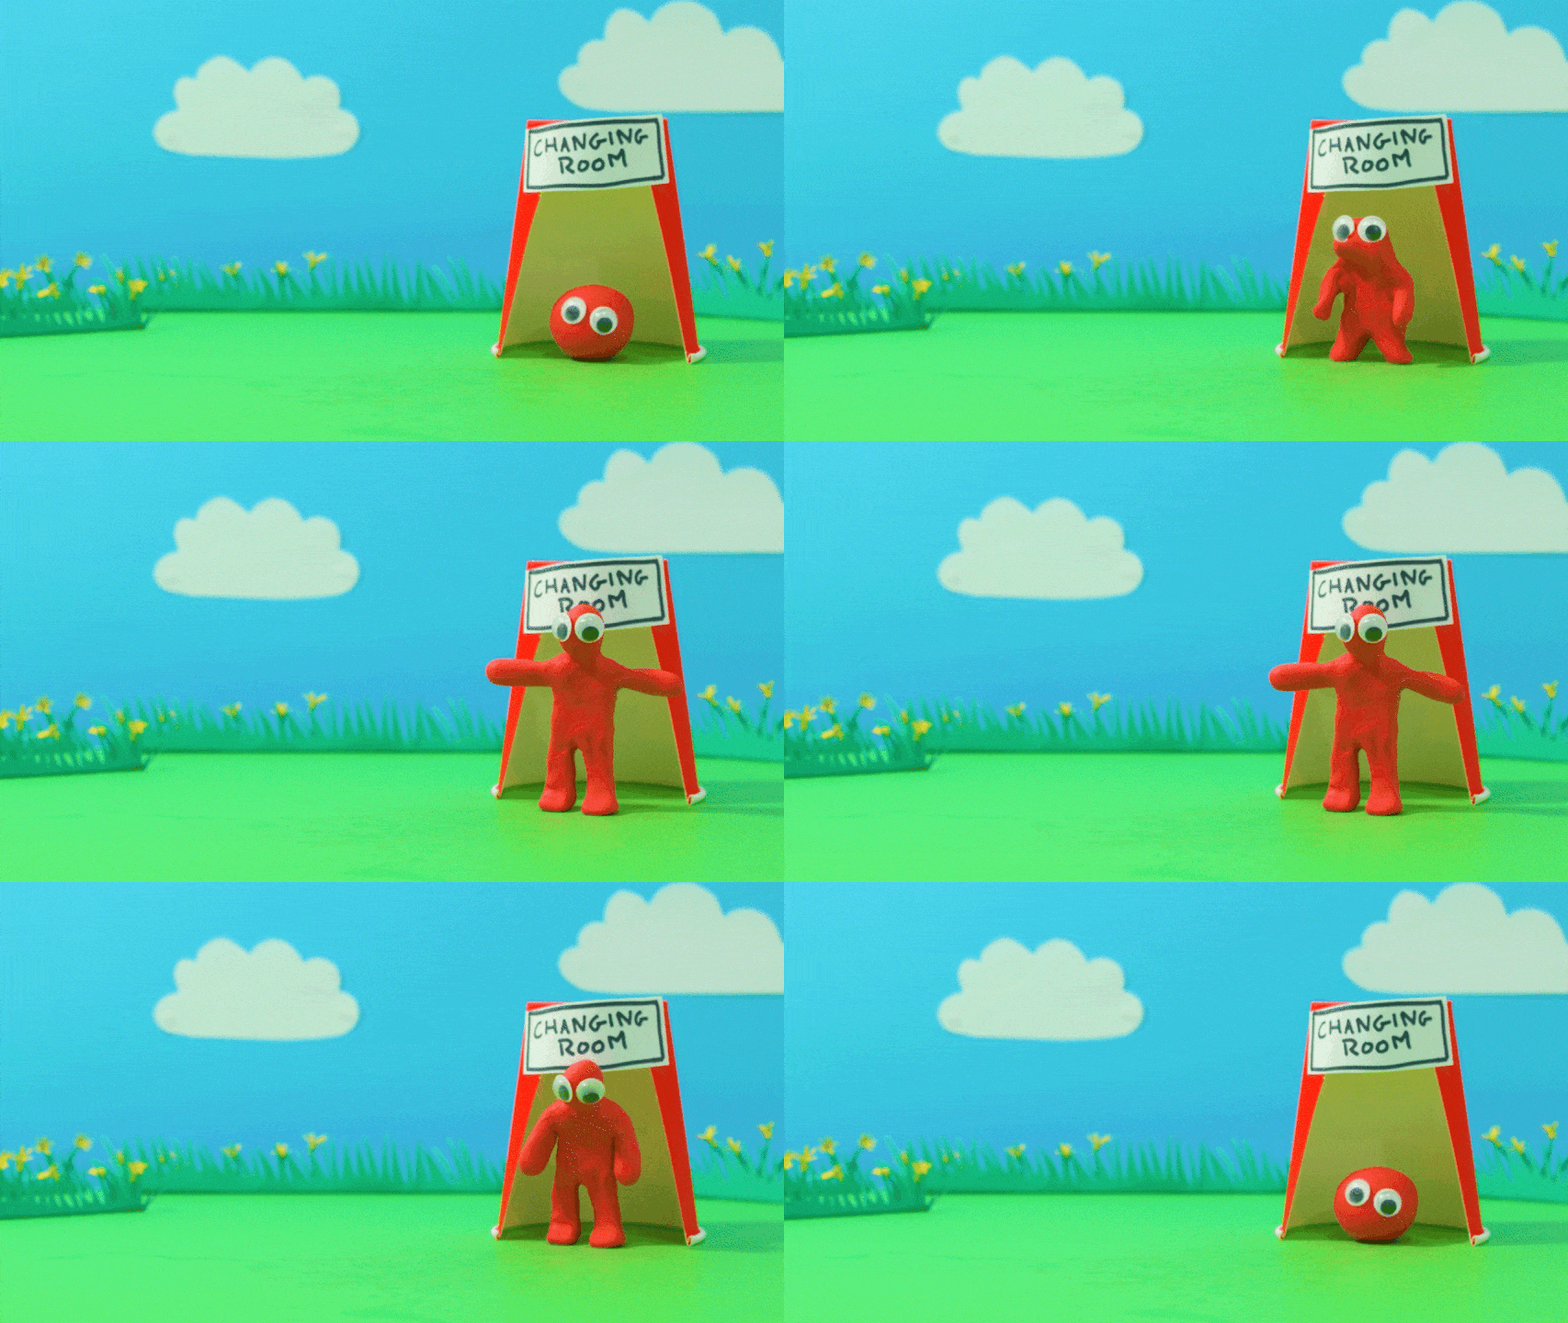
Sculpting your replacements beforehand is a great way to save time while animating. This transformation in Clayvolution was prepared before the camera was even set up! The ball and human shapes were carefully sculpted, then a spare blob of clay was used to animate the rough shapes in between as the ball morphs into a humanoid.


Remember: clay is a truly glorious material for stop motion, but can be quite challenging to work with at first. Don’t be disheartened if your initial attempts are not what you were hoping for. Practice makes perfect!
To make your claymation journey even smoother, the HUE Animation Studio kit is a fantastic all-in-one stop motion solution for budding animators aged 7+. It includes everything you need to start creating your own stop motion masterpieces at home including a flexible HUE HD camera and intuitive stop motion software that makes animating a breeze.
And now, with the launch of HUE Clay, claymation just got even more exciting! Specially designed for stop motion, HUE’s modeling clay was previously known as Newplast. It is firm yet malleable and holds its shape beautifully during long shoots, all while maintaining that classic, handcrafted claymation look. You can find both the HUE Animation Studio kit and HUE Clay at huehd.com where you’ll also discover more resources, tutorials and creative inspiration to keep your animations full of life.
Happy animating!

Find out more, subscribe to our blog, download resources, contact us or follow us on social media.


