Tutorials: HUE Animation
Tutorials: Stop Motion Studio
Tutorials: HUE Intuition
Tutorials: HUE Cameras
Tutorials: HUE Camera Viewer
Tutorials: Stop Motion Studio
In this short tutorial video, we will show you how to connect your HUE camera and create a simple animation to share with your friends, family, teachers or students.
Browse the full Stop Motion Studio for HUE playlist on YouTube for more tips, tricks, troubleshooting guidance and tutorials.
If there is something we have not covered in our Stop Motion Studio Tutorials that you need help with, please contact us for further assistance.
You can slow your animation down in two ways, either by capturing more pictures, or by lowering the frame rate of your animation project.
To lower the frame rate, click on the Project Settings icon to the left-hand side of your screen.
From the project settings window, click on the frames per second (fps) icon and drag the slider to select a lower frame rate. The lower the number the slower your animation will move.
Once you have selected a lower frame rate, click Done to close the window.
As we all know from Shrek, onions have layers.
Back in the olden days of animation, cartoons were drawn on semi-translucent paper called onionskin. This enabled animators to layer keyframe drawings on top of each other so they could draw inbetween frames to create smooth animated sequences.
This age-old technique still helps animators nowadays and the feature is available in Stop Motion Studio for HUE.
Whether you are animating on paper, with clay, LEGO®, or with found objects, the onion skin feature will show you ghost-like images of the previous frames of your animation and help you to line up your next shot.
You can use the onion skin slider in Stop Motion Studio to toggle the opacity between previously captured frames and the live camera view.
To apply the onion skin effect to more layers, click on the small numbered square to the left of the opacity slider.
IMPORTANT: Before you can add audio to a Stop Motion Studio project, you must first have some frames on the project timeline. Audio clips can then be added to one of the captured frames in the following ways:
- Recording audio with your microphone.
- Adding a sound clip from the audio library.
- Importing sounds from your computer.
Recording audio with your microphone
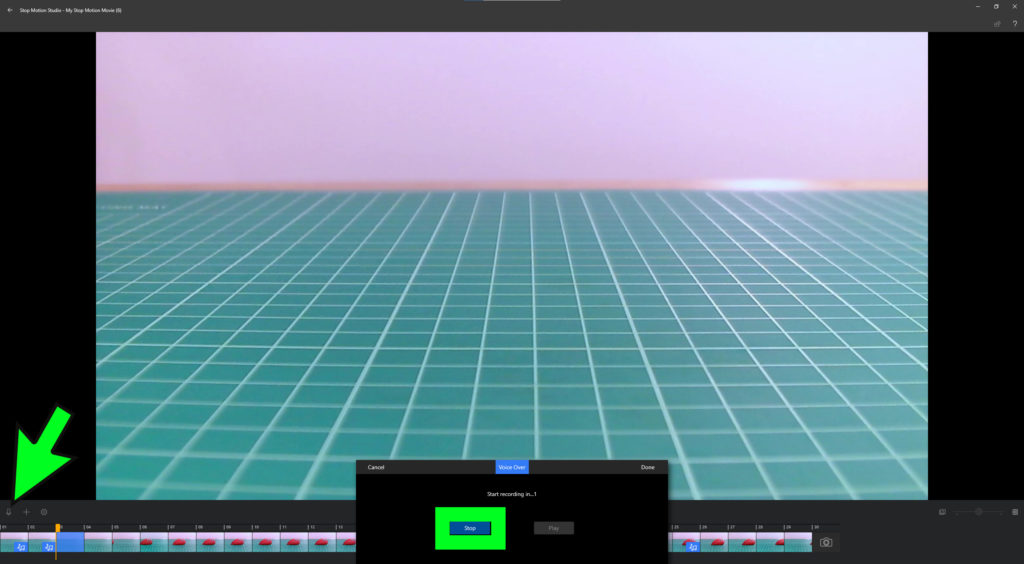
To record voice-overs or sound effects directly into your animation project, select a frame in your timeline where you want the audio to begin.
Click on the Microphone icon, to the far left of the screen, just above the timeline.
From the pop up window, click on the Record Button to start capturing audio.
Once you have recorded your audio clip, click the Play Button to review your recording.
If you are happy with your recording, click Done to close the pop up window.
Adding a sound clip from the audio library
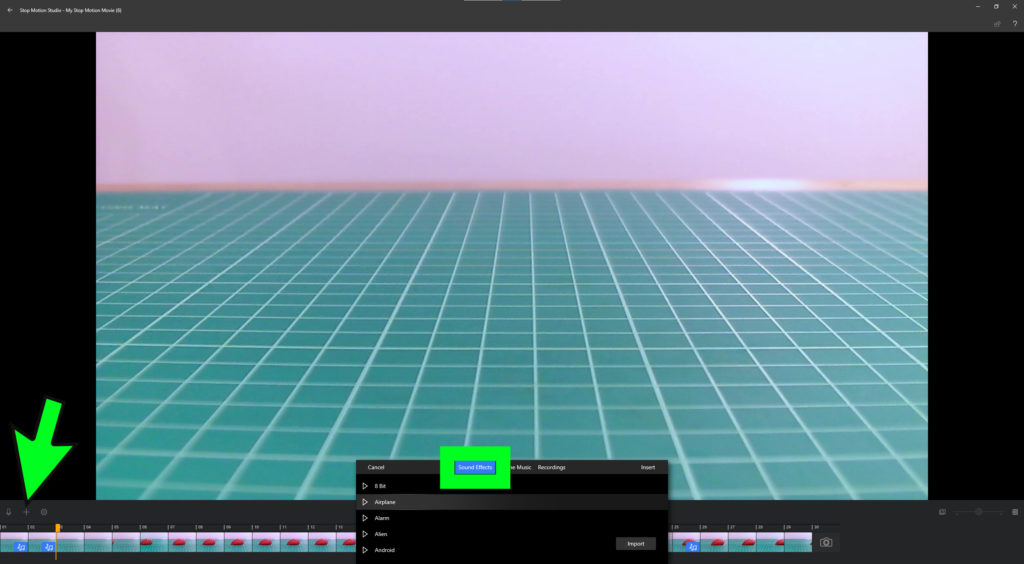
If you don’t want to record your own audio, Stop Motion Studio also has a fantastic library of sound effects and theme music that you can use in your movies.
To access the library, select a frame in your timeline that does not have an audio track (adding a sound to a frame that already has a track will replace the existing track).
Click on the Add Media (+ symbol) and select the Audio option.
From the pop up box select Sound Effects or Theme Music to view the list of pre-loaded clips.
Scroll through the list to find the perfect sound effect or music clip for your project.
You can preview each audio clip by clicking on the small play buttons next to each clip.
Select an audio clip you would like to use and click Insert to add it to your project.
If the audio clip is too long, or too loud, you can make adjustments to the volume and clip length.
To do this, right click on the audio frame in your timeline and click the Audio option in the Edit Menu.
Use the volume and trim sliders to edit your sound clip.
When you are happy with your edits, click Insert to close the pop up box.
Importing sounds from your computer
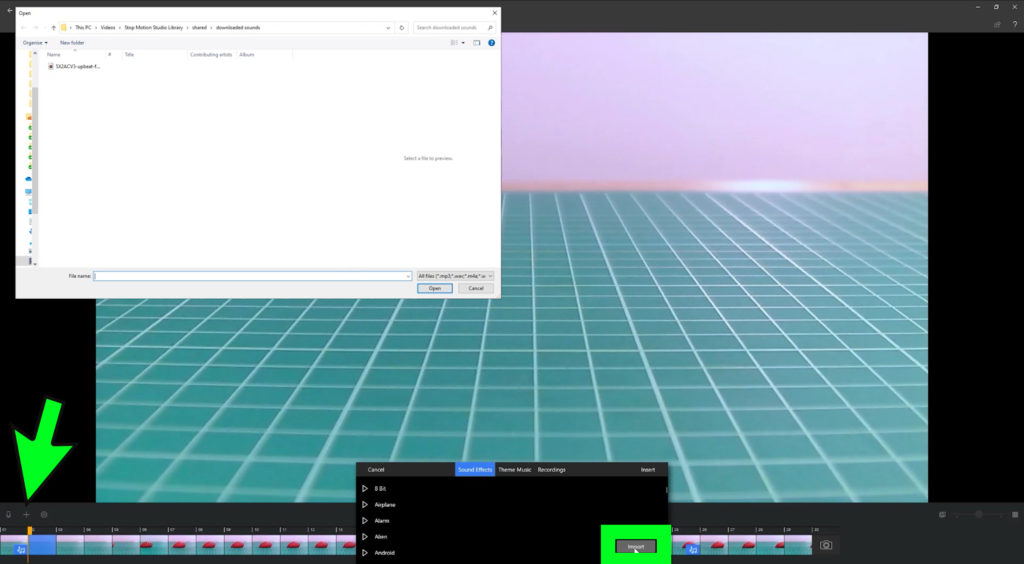
Select a frame in your timeline, click on the plus + symbol and select the Audio option.
Click the Import button.
This will open a browser window where you can search for audio files you already have on your computer.
Select the file and click open to add the audio clip into your project.
Click on the play button to hear the unedited version of your imported sound.
To edit the sound clip, right click on the audio frame in your timeline and click the Audio option in the Edit Menu.
Use the sliders to edit the volume and duration of your sound clip.
Click on the play button to preview the edited clip and adjust the sliders until you are happy with the results.
When you are satisfied with your edits, click Done to close the pop up box.
Before you can add a title or credit page to a Stop Motion Studio project, you must first capture some frames of an animation. Title pages can then be added to one of the captured frames.
Add an opening title and closing credit page to your film using different themes. You can customize elements such as the studio and movie name, the text size, color and font.
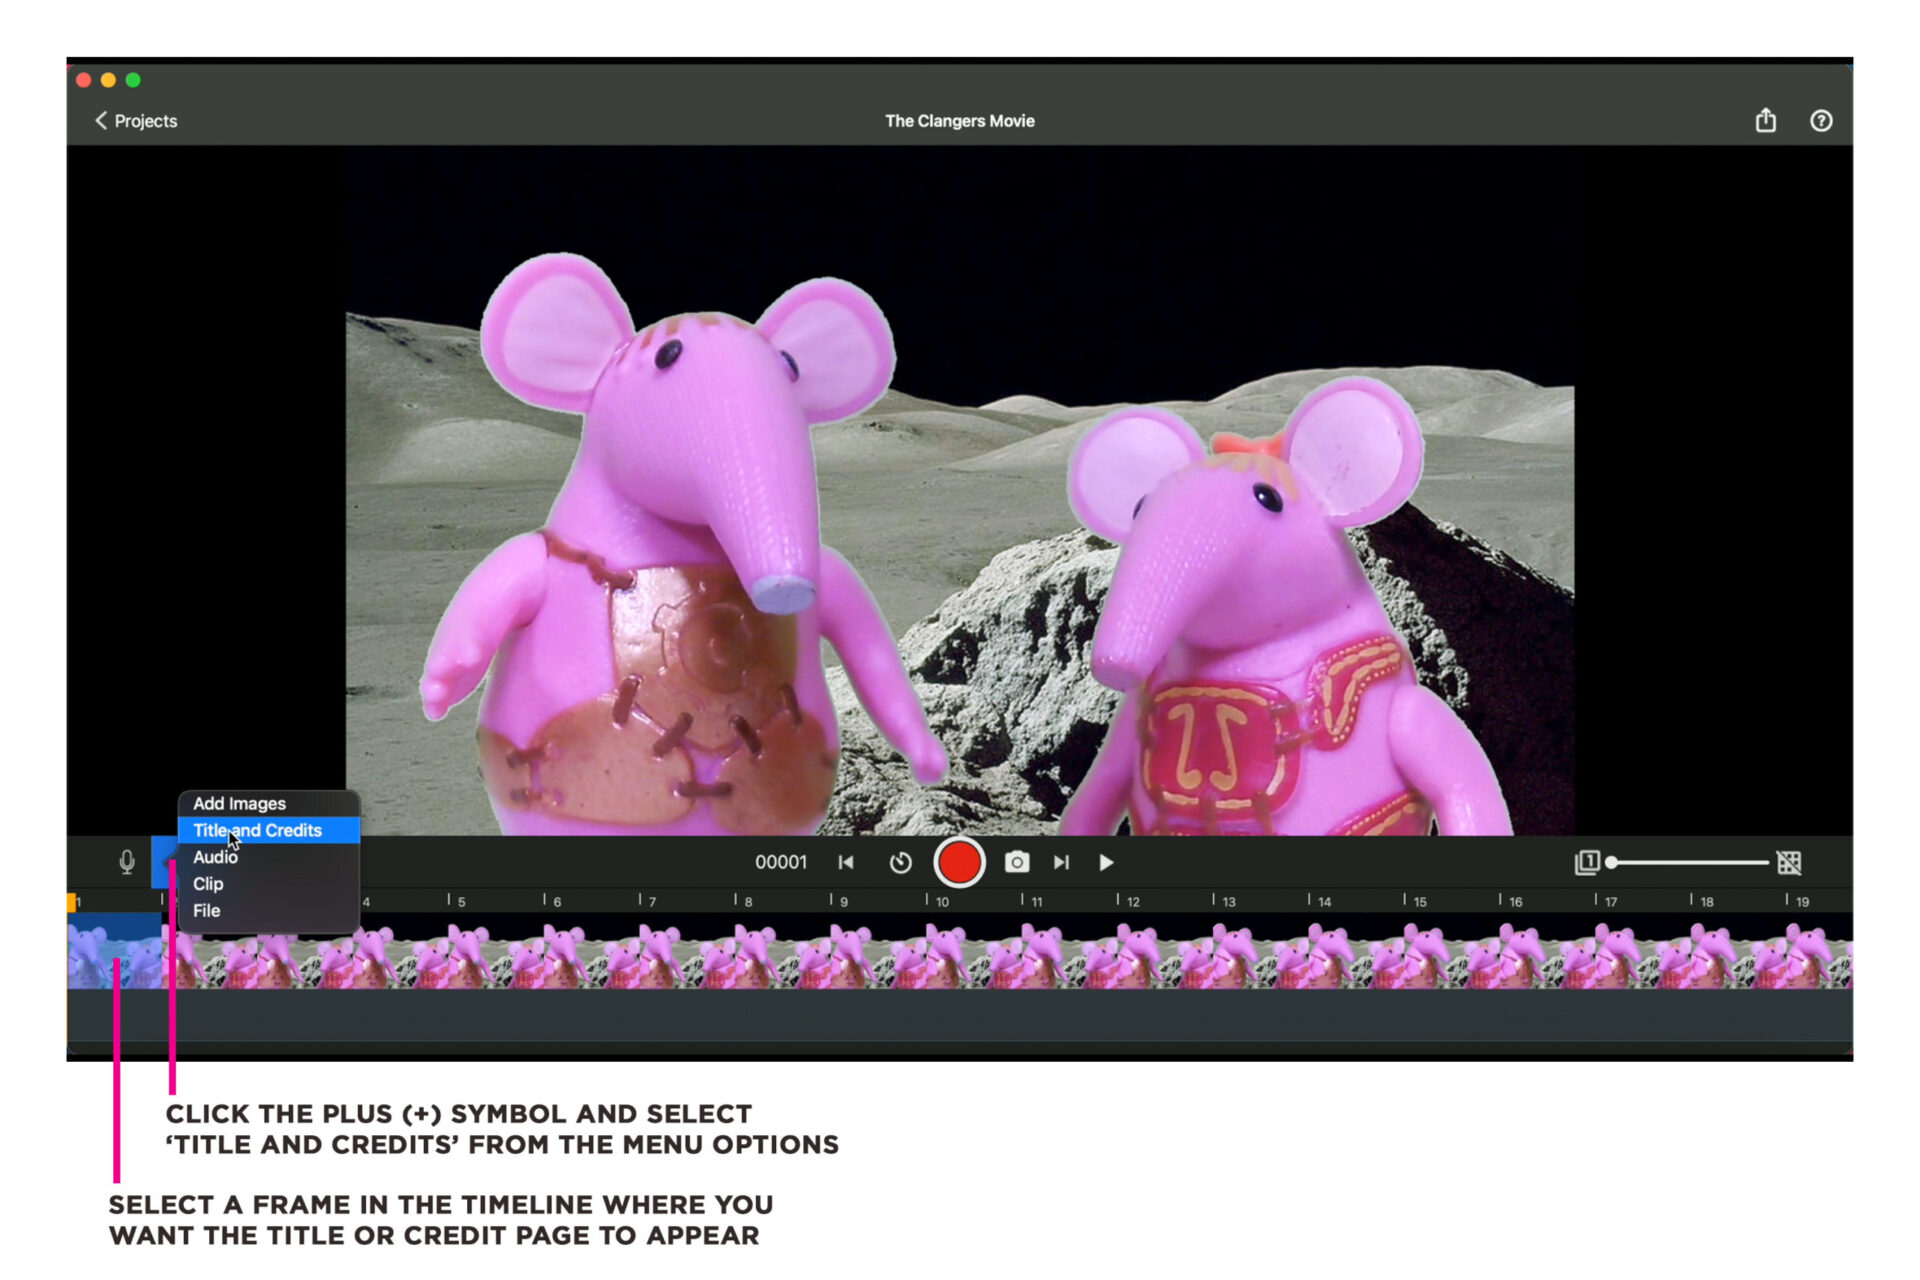
- With your project open, scroll the timeline so that the playhead appears over the place where you want to add the title or credits.
- Click the Add Media button (+ symbol), select Title and Credits.
- Click the title or credit you want to add.
- The chosen design will be opened in the image editor where you can customize the text, size, font and color of the titles.
To remove a title template from your movie, right-click the frame in your video timeline, which will open a contextual menu. Select Pause and move the slider to adjust the length of time your title appears on screen. Select Delete from the right-click menu options to completely remove your title clip.
IMPORTANT: The Green Screen effect cannot be applied to existing frames. The feature needs to be turned on BEFORE you capture any frames.
The Chroma Key function lets you select a color from your scene (green or blue) and replace it with an image.
Set up your animation scene with a bright green or blue background and make sure your characters are a different color from the background you have chosen.
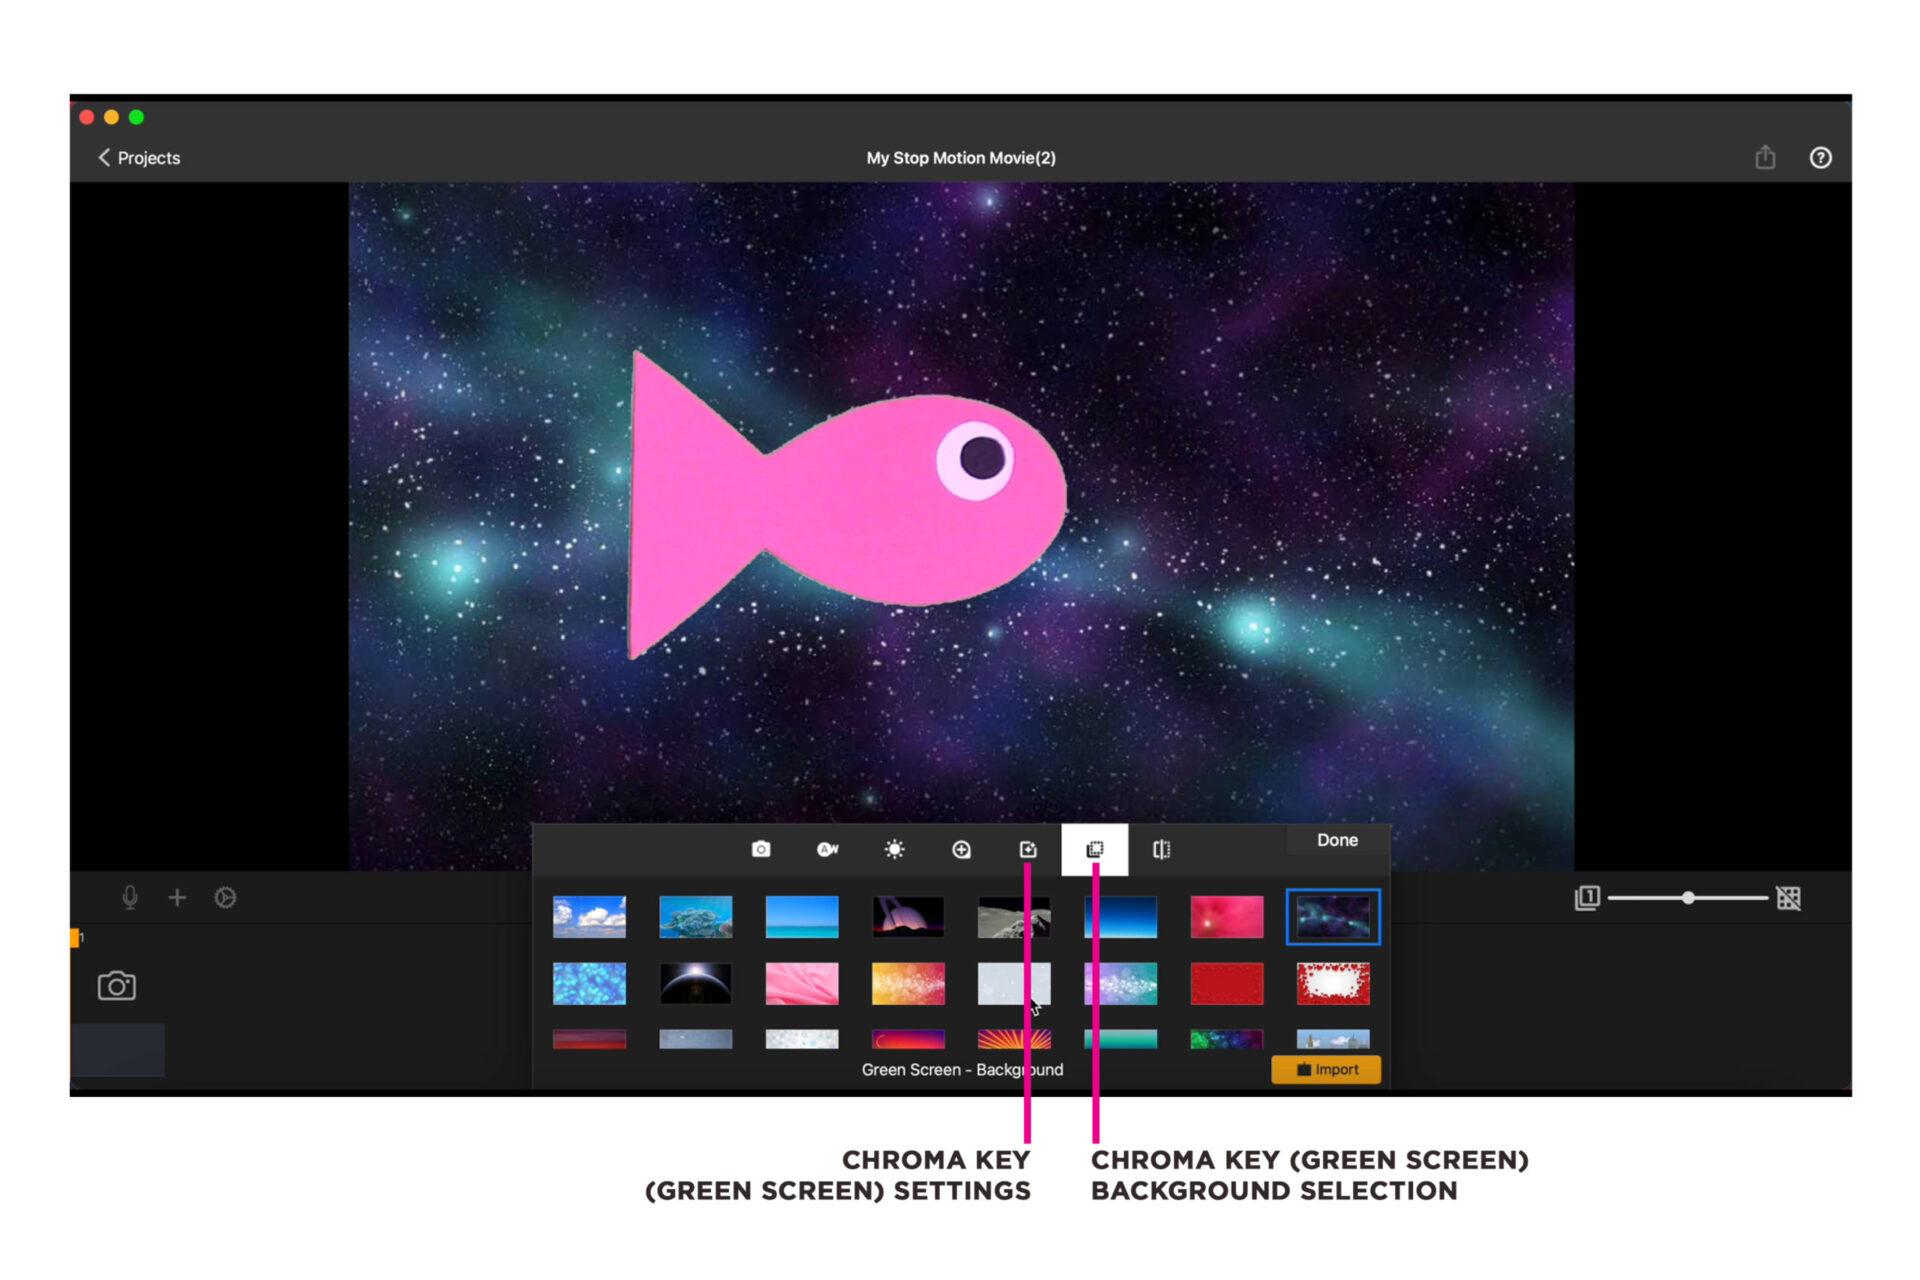
It is important to illuminate your background with bright, even light. The better lighting you have, the better chroma result you will get.
- From the movie editor, click the capture settings symbol
.
- Select the green screen
and pick a color to remove from the image.
- Toggle the sensitivity slider to adjust the strength of the color key.
Click DONE when you are happy with your settings and start animating.
Time-lapse is a technique used in film-making to record processes that take place over long periods of time.
By capturing images at set intervals, we can see a high-speed version of reality when the footage is played back as a movie.

To create a time-lapse sequence in Stop Motion Studio for HUE:
- Click on the TIMER icon to the left-hand side of the red CAPTURE BUTTON.
- Use the slider to choose the number of seconds you want to set between captured frames.
For things that move slowly, such as plants growing, set a longer interval between frame captures. For faster moving activities, such as drawing or LEGO® building, set a shorter interval.
- Once you have set the interval, click DONE to close the time-lapse setting window.
- When you are ready to begin your time-lapse, click the red CAPTURE BUTTON to start auto-capturing images.
- When you have finished your time-lapse, click the red CAPTURE BUTTON once more to stop capturing images.
If you want to capture frames manually, don’t forget to return the auto-capture interval slider to the OFF position.
When you are animating it can sometimes be helpful to copy and paste, and reverse, frames of your animation to create a loop of your footage.
To do this, you first need to select all the frames you want to copy In the project timeline.

When you have selected your frames, right click on any of the selected frames to open the editing box.
Select COPY from the menu options, right click where you want to paste your frames and select PASTE from the editing box.
Animating LEGO® characters is lots of fun, but it can be tricky to change their facial expressions by replacing their tiny heads.
Thankfully, Stop Motion Studio has a fantastic feature that enables you to add digital faces to your LEGO® characters after you have animated them.
You will need to turn your LEGO® Minifugure’s head all the way round so that you can animate your character with a blank face.


To add faces to your character:
- Right-click on the first frame in the timeline and select Edit.
- Click on the plus (+) symbol at the top right hand side of the screen and select Face.
- Use your mouse to resize and position the LEGO face so it fits perfectly onto your character.
- Copy the face by hitting Command – or Control for PC users – plus the C key on your keyboard. Alternatively, right-click the face layer on the sidebar and select Copy.
- Click on the small arrow at the top of the screen to display the next frame (you can also use the arrow keys on your keyboard).
- Hit command – or control for PC users – plus the V key on your keyboard, to paste the face from the previous frame.
Repeat this process for all of the frames that will be using the selected face.
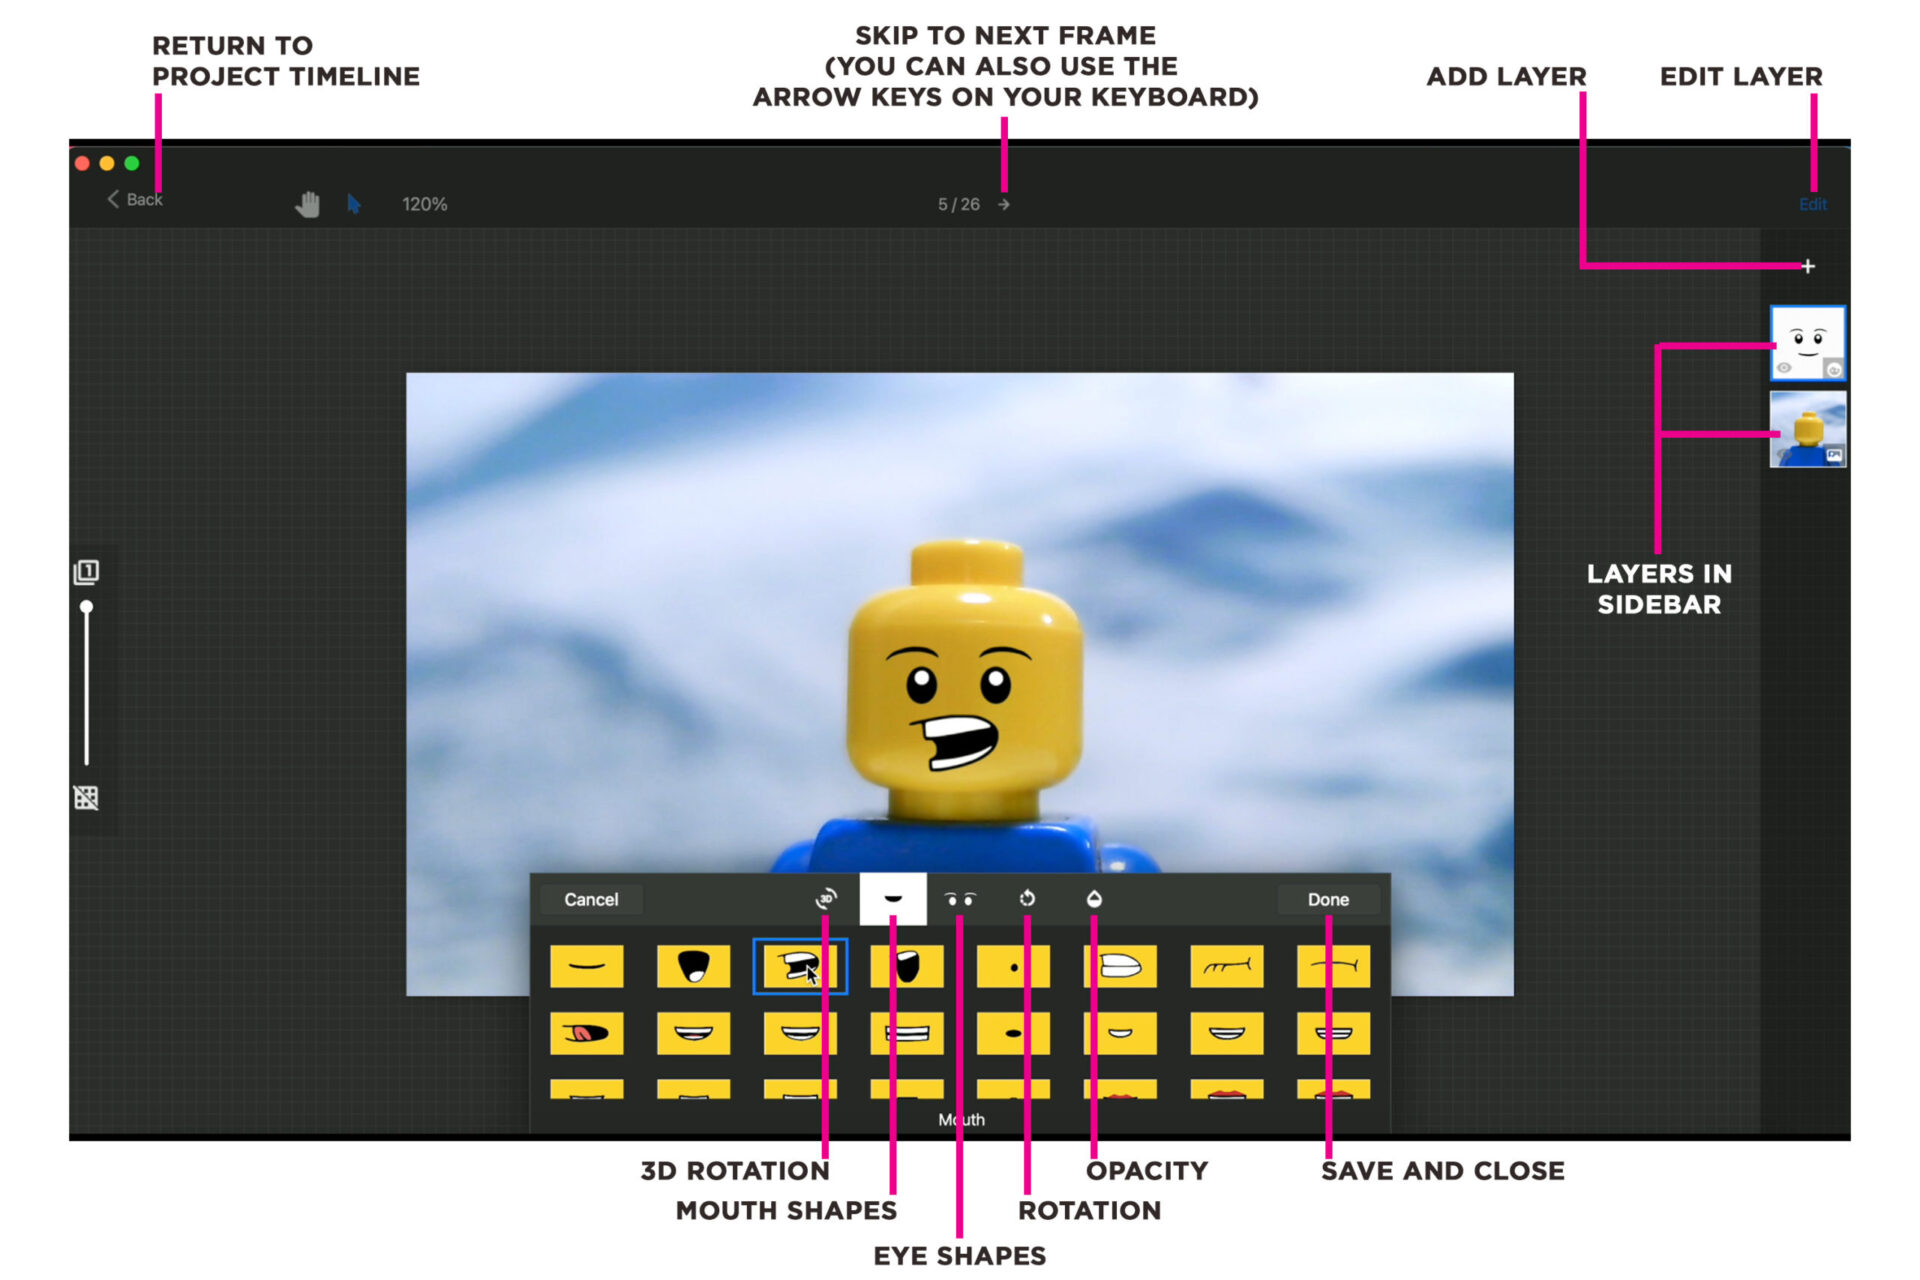
To edit the face:
- Select the face layer in the sidebar.
- Click on Edit at the top right hand side of the screen.
Here you will find lots of fun options such as changing your character’s eye and mouth shape, opacity and rotation.
Once you have finished editing the face, click Done.
To return to your project timeline, click the Back button.